


Recording electric bass guitar is one of the biggest challenges for your home or project studio. Getting a satisfying “thump” while keeping clear articulation and definition is a balancing act. Once you’ve got the proper recording techniques down, you’re on your way to recordings that will make your friends wonder if you’ve been sneaking out to a pro studio. In this article, we’re going to look at the challenges involved and offer up some solutions, from various spins on recording bass guitar direct to how to use microphone placement and combinations to capture that roaring beast.
Pre-Production Planning
Your Studio
Your Mindset
Going Direct
DI Boxes
Preamp vs. DI
Plug-ins and Amp Modeling
Re-Amping
Recording Bass With Microphones
Microphone Types
Single-Mic Techniques
Multi-Mic Techniques
Phase Issues
Setting Up to Record with Multiple Mics
Hybrid Recording Methods
Expand Your Sonic Horizons and Your Gear
Pre-Production Planning
The best recording techniques for bass start with a little thought and planning. This preproduction stage is important for a number or reasons. Having a solid game plan for tracking saves time in the studio. If everybody (and in your home studio, everybody might be just you) sees a clear path to the finished track, it makes it easier to get there. Also, it can save you from frenzied calls to friends after the music store has closed and you discover that you don’t have the cable, DI box or other critical piece of gear you need to get it done. So, we’re going to start with a short look at what you need to have together.
Your Studio
As we have throughout this series of articles on recording, we’re going to make some assumptions about your gear. Those are that you are recording using a mobile device or computer with an independent audio interface and have some sort of DAW software (Pro Tools, Logic, Studio One, Ableton Live, etc.). Every DAW package has a workflow that’s just a little bit different, so when we refer to your DAW, we will be talking about general shared features like routing, signal/dynamics processing and audio modeling plug-ins.

Pictured: AVID Pro Tools Studio
Let’s touch on your audio interface first. To get the best results for recording bass, your interface needs to have multiple inputs (at least two) and a decent amount of gain in the internal preamp. This should be 30–60 dB of gain, although some mics, like passive ribbon mics, might need a little more than that. Your interface should also have the ability to provide phantom power for condenser microphones. Some external devices, like active DI (direct injection) boxes or external mic preamps, are also powered this way.
Second, if you will be using the direct recording route to capture your bass or using a hybrid DI/microphone combination, you will need a DI box. More about these in just a little.
Third, you’ll need microphones. For recording electric bass guitar, you will want to start with a single mic like a Shure Beta 52A or AKG D112 — a mic that’s specifically designed to deal with the low frequencies you’ll be capturing. You may also need some sort of isolation for any bass amp you might be using, to minimize audio bleed from other sources, like your neighbor’s dog. The platform type, like the Auralex Gramma, decouples the amp from the floor for less “woofy” recordings and helps keep everything else from rattling when you hit those low notes.
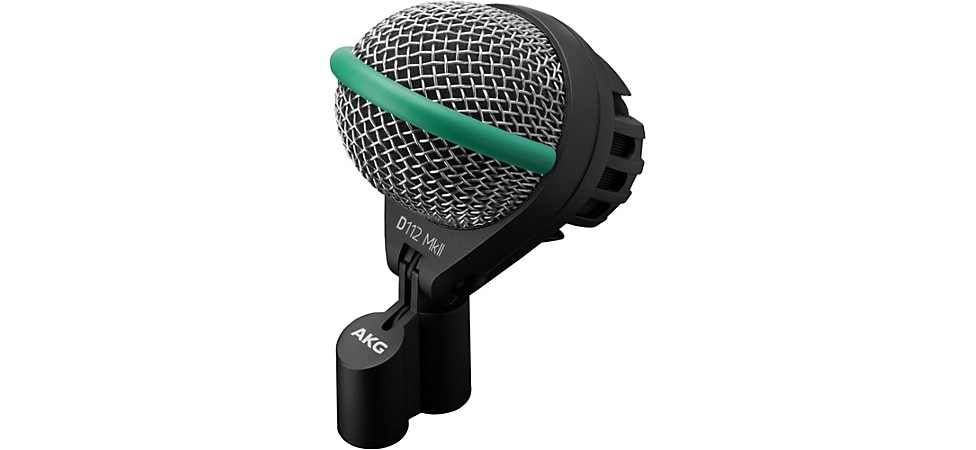
Pictured: AKG D112 MKII Dynamic Microphone
Your Mindset
When you pull back far enough, there are two basic approaches to recording bass. The first is to try and record the instrument being played within a specific space. The inclusion of the room sound does mean that you’re more or less committed to that “space” for that song, unless you go through the process again. If you have a real solid idea of what the final song should sound like, and have a great sounding room, this method is simple and as quick as getting a good take to use.
The second approach is to record the bass with as little room sound as possible. This method enables you to capture the performance, and be able to go back and change the instrument’s ambience later without having to re-track. You can create a perfectly doubled track that’s run through a totally different virtual signal chain, without inconveniencing the bass player. Or, you can use a buss send with a high-pass filter to add effects without weakening the fundamental tone. If you, or the person you’re recording, treats the studio like an instrument in its own right, or if the nature of the song is liable to change, recording this way offers tremendous creative freedom, as well as saving a lot of time.
It’s important, especially if you’re recording yourself, to do a mental reset and think like a producer/engineer, rather than as a player. Consider the functions any bass tracks are going to serve in the particular song you’re recording. A little time spent pre-planning your tracking sessions can save a whole lot of time on the other end of the production.
Going Direct
By far the most commonly used method of recording bass guitar over the past 50 years has been going direct. Whether with a DI box or straight into a mixer input or board channel, direct recording has advantages for any bass track that needs clarity and punch. Let’s take a look at several options for taking the direct route.
DI Boxes
The basic tool for getting great bass recordings has been the DI box. Even if your audio interface has quarter-inch instrument jacks, either dedicated or on a combination XLR/TRS jack, gracing one or two of the inputs, this is still a tool you’ll want to have handy in the studio. Basic DI boxes are designed to do a couple of things. First, they match the output impedance of whatever you plug into them to the proper input impedance for a mic preamp or audio interface input. Second, they will match levels to what the input is expecting to see. Third, and sometimes this is the most important thing, they can be used to kill the nasty hum that creeps in from electro-magnetic (EMI) and radio-frequency (RFI) interference. This usually is done with a ground-lift switch. There’s frequently a switchable attenuation pad as well. They also provide a pass-through quarter-inch connection, so you can simply stick it between the bass and bass amp to get a no-loss signal both to the board/audio interface and to the amp.
DI boxes come in many shapes and sizes, but there are two principal types — active and passive. In an interesting turnabout, passive DI boxes are best used for basses with active electronics and active DIs work better for passive instruments. A basic passive DI, like the Livewire SPDI, has all the basic features (ground lift, pad switch) and is inexpensive enough to keep several hanging around your studio and in your live kit. Even when you’re not recording, they can be a quick solution to a noisy electrical supply. Aside from the unit we already mentioned, you’ll want to check out the full line of DI boxes from Radial Engineering, or the Rupert Neve Designs Active DI Box, from one of the biggest names in recording tech.

Pictured: Rupert Neve Designs Active DI Box
Using a DI box is simplicity itself. Especially for small home studios that are tight on space or with sound-sensitive housemates or neighbors, it’s a seriously elegant solution to getting high-quality bass tracks. If you’re not using an amp, plug the bass into the box, run the XLR out from the box to your audio interface, and go. You’ll probably want to use some light compression on the input channel in your DAW, but that’s it. There’s another take on DI recording that’s worth examining if you are looking for a little more personality.
Preamp vs. DI
Many recordists love the “blank slate” character of a straight-ahead DI bass recording. Once it’s in your system, you can bend and shape it however you want. For those who want to get a little more personality on the basic track, there are a wealth of combination preamp/DI boxes available today. Units such as the Acoustic Bass Preamp and DI Pedal (BPDI) and MXR M-80 Bass Direct Box with Distortion, are pedalboard friendly, making them great solutions for both live and recording use. A unit that offers a little something extra is the Orange Amplifiers Bass Butler. This unit splits the signal internally for a bi-amp output. One side is kept clean and punchy. The other runs through a high-gain amp circuit for adding distortion and growl while keeping the basic signal clear. It’s a great solution for modern, ultra-aggressive bass sounds that can minimize later processing. If you really want the most versatility in your final result, there’s another solution to look at as well.
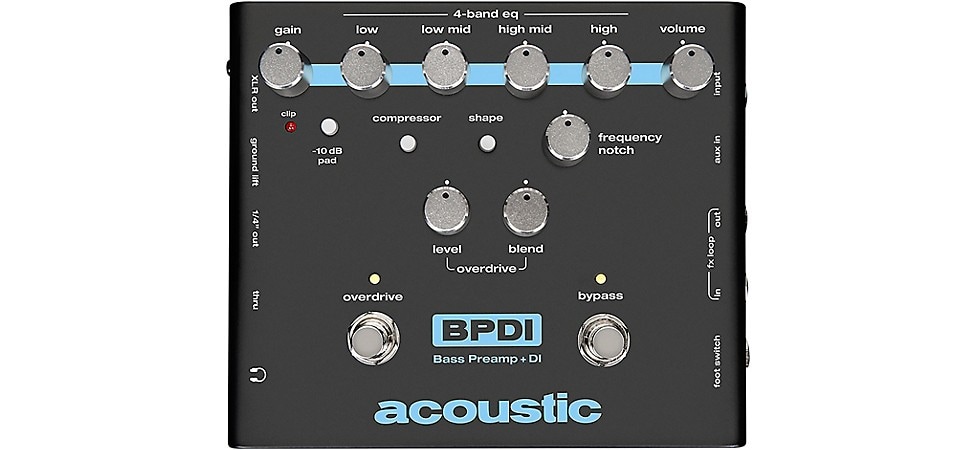
Pictured: Acoustic Bass Preamp and DI Pedal (BPDI)
Plug-ins and Amp Modeling
One of the coolest developments in recording over the past couple of decades has been the growth of the software plug-in. Every basic DAW package comes with a high-end studio’s worth of plug-ins for EQ, dynamics processing (compression, expansion, gates, etc.) and time-based effects (delays, reverbs and the like), from basic to models of rare, premium studio units. Third-party developers have also created a huge library of plug-ins and virtual instruments that cover a range from specialty effects that are only possible in the digital world, to amazingly accurate models of rare vintage instruments, effects and amplifiers. There are some great plug-ins for bass that will make your recording life easier. You’ll also find that many of the guitar amp modeling plug-ins can provide great sonic texture, and all without the possibility of blowing the speakers on that vintage cab.
There are a couple of basic approaches to consider using plug-ins when recording bass. If you have a specific sound firmly in mind for a song, place whatever plug-ins you’re using in the signal path of the bass input channel of your DAW and simply record the output of that signal path. Most DAWs will call this “post-fader” recording. If you think you might want to do more than just basic EQ tweaking in mix, you can gain a lot more flexibility by recording direct, then bouncing the track with the amp and effects plug-ins in place. This gives you a solid track, but retains the ability to make radical changes later. This also saves on CPU use, if your computer is running low, to keep things running smoothly.
Most DAWs come with basic amp modeling plug-ins, some of which are quite useful, bundled in. If you want to go deeper, third-party bass amp plug-ins, like the ones you’ll find in IK Multimedia’s AmpliTube SVX 2 and Native Instruments’ Guitar Rig, included in NI's Komplete bundle, have great collections of rare vintage and in-demand modern bass amp models. You can even combine them in a channel’s signal chain if you find you prefer one plug-in’s cabinet models and an amp model from another. As we touched on above, experiment with swapping in some of the available guitar amp and cabinet models. After all, in many classic recordings, there was less differentiation between the two. Many iconic bass and guitar tracks were recorded with amps that weren’t strictly meant for the instrument. They just sounded right.

Pictured: IK Multimedia Amplitube SVX 2
Universal Audio’s Unison technology advances the state-of-the-art by providing custom tweaking of input impedance and response with their Unison-enabled plug-ins and hardware. Available in the Apollo series of audio interfaces, these plug-ins rely on the built-in UAD DSP hardware. There are Unison plug-ins that model vintage and modern bass amps, plus a plethora of vintage and modern mic preamps.
Another big advantage of applying the modeling plug-in after recording a direct track is that ability to more easily dial in a sound that works in your final mix. Rather than having to add EQ to an already EQ’d track, you can, effectively, dial in the amp to fit the track after the fact.
The disadvantage is that multiple plug-ins can start to eat up your computer’s CPU power pretty quickly, especially if you’re not using something like UA’s outboard DSP. There is, however, a solution for almost totally off-loading the DSP power needed. After all, what is a modeling pedal but external DSP?
Modern digital modeling hardware, with exceptional versatility and ease-of-use, are especially good for home recording and project studio applications. Bass amp and cabinet modeling is available in the Line 6 Helix family or HeadRush series, the BOSS GT-1000, which added bass support in their V3 firmware update, or dedicated bass system, the GT-1B, or you can get fancy and spin your own with the Kemper Profiler. Since these units also serve as class-compliant USB audio interfaces in their own right, including having an XLR input for plugging in a mic, they may be all you need. If you are only recording one or two tracks at a time, or if your computer OS allows for composite virtual audio devices, this makes your recording path for bass much simpler.

Pictured: Boss GT-1000
Once you’ve hooked up your modeling gear and installed any necessary drivers, you’ll find that this one device can cover both approaches to bass recording. You can just set up the sound you want and track it. You can also record the bass direct and clean, then feed it back to the modeling unit to change sounds on the fly (a process called “re-amping,”). Many of the modeling units have a re-amping setting that’s available when they’re connected via USB. Please consult your manual for this, since they all do it slightly differently, so that configuration is beyond the immediate scope of this article. There’s no rule saying you can’t use both modeling hardware and plug-ins together, either. What counts is that you get the sound.
Re-Amping
We touched on the concept of re-amping a part in the section on recording with modeling gear. You can do the same thing with physical amps and effects, too. This takes a device called a re-amping box. Basically the reverse of a DI box, it takes a line level signal from your recording system and uses transformers to drop it to the correct instrument level and impedance to feed effects pedals and/or an amp. Doing this lets you re-record that part through a different amp and effect chain without having to play the part again. This is a great way to layer tracks and make your bass sound absolutely huge at mixing time. Check out Radial Engineering for a full range of passive and active re-amping boxes.
Recording Bass With Microphones
Even though going direct has long been the standard for recording electric bass guitar, adding a mic, or mics, to the process can expand your tonal range. This can give some serious vibe to your tracks, especially if you’re trying to approximate the urgency of a live performance. Before we dive into techniques, let’s take a moment to talk about microphones.
Microphone Types
While we don’t have the space here to do a complete breakdown on microphones for recording, probably the basics are the best place to start.
There are three fundamental classes of microphones—dynamic, condenser and ribbon—each of which have basic sonic characteristics, which this handy little table should sum up nicely. As with everything, there are a number of exceptions (for example, omnidirectional dynamic mics aren’t very common, but there are some), but we’re going to talk about the most common types.
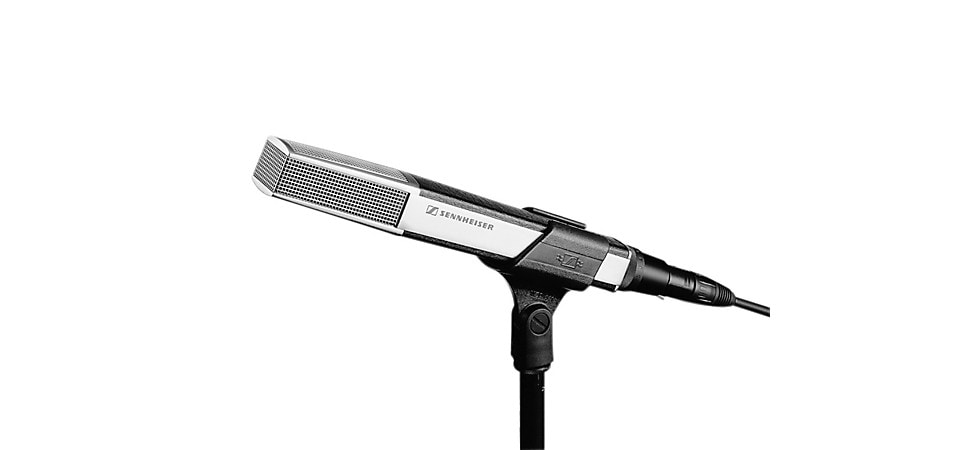
We’ll start with most people’s first mic, the dynamic. Sturdy and reliable, dynamic mics have a fairly neutral tonal balance and strong proximity effect. They handle high SPL exceptionally well. Their most common polar patterns are cardioid and hyper- or supercardioid. Mics you’ll want to check out are those that are designed for, or commonly used for, low-frequency instruments, like kick drums. These include the AKG D112, Shure Beta 52A, Electro-Voice RE20 and the Sennheiser MD441U, but there is a much larger selection available in this category than we have room for. We’re just touching on a few, and you’ll find more at guitarcenter.com.
Our next stop are the condensers. There are two main categories, here: Large-diaphragm condenser (LDC) and small-diaphragm condenser (SDC) microphones. For bass recording, the large-diaphragm mics are the choice, but we’re including info on both for completeness. Also, because experimentation with different mics can sometimes end up with the tone you’re seeking. Condensers have exceptional transient response, as well. Because of this, they are great for capturing an instrument’s attack.
First, let’s look at large-diaphragm mics. Condensers are more “hi-fi,” generally brighter and more precise than dynamic mics. LDCs come in every conceivable polar pattern. Many have switchable patterns. They require a source of external (phantom) power and deal with high SPL quite well. Good choices here include the AKG C414, Neumann U 87, Mojave MA-50, Audio-Technica 4047 and Shure KSM32.
Small-diaphragm condensers share a lot with their larger siblings. They are more sensitive to high frequencies, though, due to the decreased mass of their smaller diaphragm. Most are either some type of cardioid pattern or omnidirectional. Some are available with swappable capsules, so you can get different pickup patterns on the same mic body. Most manufacturers have matched stereo pairs available, which are handy for many applications. Recommended choices here are the Shure SM81, AKG C451, RØDE NT5, Neumann KM 184 and sE Electronics sE7.
Ribbon mics have been around for almost a century, and have been having a resurgence over the past couple of decades, thanks to new designs from companies like Royer and AEA. Ribbons are warm and full with a natural high-end rolloff. They may not have the transparency and “air” of the condensers, but their unique character often sees them as the second mic in a multiple-mic setup. Note: Because of the high energy inherent in low frequencies and the associated intense air pressure wave, a vintage mic with older materials used in the ribbon wouldn’t be used. However, changes in material science and new designs make for much sturdier mics, especially in the active models from the companies we’ve mentioned. Active ribbons also deliver expanded frequency response while keeping the essential character of the type. The nature of the ribbon design means they almost all have a figure-of-8 polar pattern, so they’re great for capturing a little extra room sound, whether used close or at a distance. We recommend you check out the Royer R-121 and R-10, Sterling Audio ST170, AEA NUVO N8 and sE Electronics Voodoo VR1.
Building a mic collection can easily become a musical obsession. For bass, start with a couple of dynamics designed for low frequencies, like the AKG D112 or Shure Beta 52A, to get the biggest punch After that, you’ll want at least one large-diaphragm condenser mic in your collection, preferably one with a built-in pad and low-cut filter. Ribbon mics may date back to the early days of radio, but, with new materials and refined designs like the ones from Royer, they have been undergoing a resurgence in the last couple of decades.
Some of the techniques we’ll talk about in the coming sections use a single mic, some two or more. Once you’ve mastered the techniques we’re about to cover, feel free to try other approaches. All recordists experiment, and you may find that doing something different is the key to unlocking the sound in your head.
Single-Mic Techniques
There’s never a reason not to record one bass track direct with a good DI box. Since modern DAWs have pretty much unlimited track count, using a direct track not only gives you a safety track, but it also gives you something to mix in underneath the miked tracks to add a little definition when you need it. A properly miked-up bass amp can bring a whole new level of texture to your final track. The usual mics used for single-mic recording on a bass amp are dynamic mics, with an emphasis on the mics that are designed for low frequencies, like the afore-mentioned Shure Beta 52 and Electro-Voice RE20. You can also try one of the LDCs, like the Shure KSM32, if you are looking for something with a little more “air.”
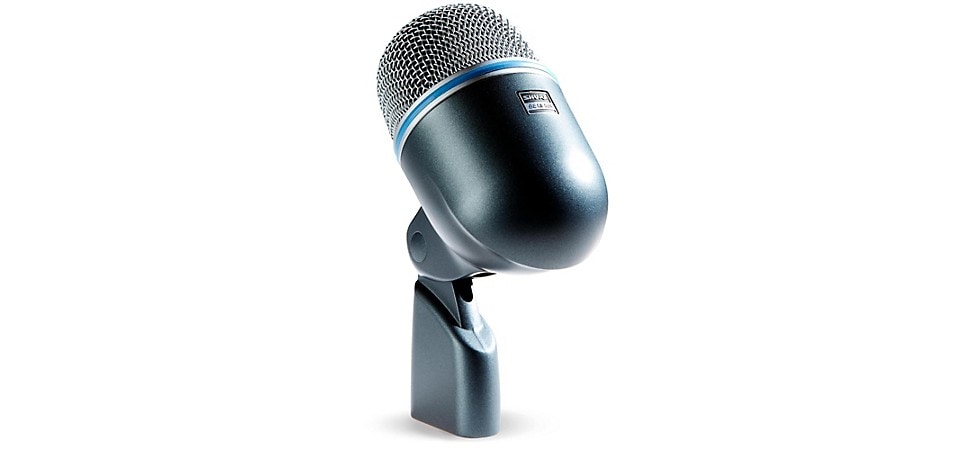
Pictured: Shure Beta52A
Here are some keys to getting great bass recordings with a single mic. First is understanding how the sound of your speaker varies. If you put your head up to the speaker grille (and please don’t do this at volume levels that will hurt your ears, because you’re gonna need those things) and listen as you move it around, you’ll hear that the speaker is brightest/most treble-y in the center and gets darker/bassier as you move to the edges. This is because there’s more mass for the magnet and speaker diaphragm to move the further away you get from the center, so it can’t move as quickly. So, the first rule of placing microphones close to the speaker grille is “treble middle, bass edge.”
Traditional single-mic placement is almost touching the grille cloth, aimed at the point where the dust cap (that dome at the center of the speaker) is glued to the speaker cone. Pro tip: A simple hack for doing this quickly is to use a small flashlight held next to the mic, making it easier to see through the grille cloth. If the sound is brighter than you want, move the mic out toward the edge of the speaker until you find the balance you’re looking for. It’s easier and safer to do this wearing a set of studio headphones with an extension cable and monitoring the mic directly as you move it around while someone is playing through the amp. The goal here is to get as close as possible to the sound you want without having to use any EQ, since the nature of EQ is that it introduces phase differences. If you EQ when you’re tracking, you can’t change your mind about that choice after the fact, so it’s worth the effort to get the sound right up front.
There is one special consideration for miking bass cabinets for recording, though — what type of bass cabinet you’re dealing with. There are two basic types of cabinet for bass—the totally sealed, or “infinite baffle,” cabinet and the tuned port, or “bass reflex,” cabinet. Without going into a lot of contentious arguments about which is “better,” (your ears, your cabinet, you decide), close miking techniques, as spelled out above, will work better on the sealed cabinets because there’s less difference between how it sounds close or distant. Ported bass reflex cabs, on the other hand, can sound a little dead close mic’ed, because the sound of the port, which is tuned to complement a certain frequency in the speaker response, is necessary to get the full sound of the cab. However, the seemingly obvious solution of sticking a mic on the port itself is not the thing to do. For ported cabs, you’re going to get better results with the mic at least the diameter of the speaker away, aimed at the center of the cab) so you get a blend of the sound of the speaker and the sound of the port. In this particular case, it also helps to have some isolation, like foam baffles, on either side of the cabinet to minimize room reflections caused by acoustic spill from the cabinet.
The second thing to understand is how the angle of the mic affects the sound. A mic that’s aimed straight in at the speaker is referred to as “on-axis.” This will give you a more focused sound with more well-defined high end. A mic that is aimed at an angle to the speaker is called “off-axis,” and will roll off the highs a little to give you more lows. If the angle is sharp enough, you may start picking up a little bit of room sound. Once again, you can use headphone monitoring while positioning the mic to fine-tune the sound. If it helps, think of the mic as a sort of remote ear that doesn’t work quite as well as your regular ears do.
The final thing you need to consider in single-mic techniques is the effect that distance from the amp has on the sound. As you pull back the mic, say from one inch to one foot from the grille, you’ll hear the sound gets slightly less well-focused, but becomes more balanced, as the mic is “hearing” more of the speaker. You’ll also find that you get less “punch” as you move the mic away. The further back the mic is, the more room sound you’ll get. If you’ve got a really good sounding room, this is a great place to try out a good ribbon mic. Ribbons aren’t great for close miking low-frequency instruments but can really add some vibe at a distance, thanks to their inherently warm nature and figure-of-8 polar pattern. Note: Because low frequencies carry a lot of energy, they tend to make any loose objects in a room start to resonate in sympathetic vibration. Distance mics will be picking that up, so shockmounts become very important, as does tightening up, taping down and otherwise securing everything that might rattle. If there’s a drum kit in the same room, use the snare throw-off and toss a blanket over the whole kit. Although it might be a worthwhile experiment to leave the bass drum uncovered and mic’ed, run to a separate track to mix way back later. Just sayin’.
You’ve got the info you need to experiment with single-mic placement techniques now. But what if you want more? To get a combination of that close-up “punch” and the sense of being in a space, we have to move on to using multiple mics.
Multi-Mic Techniques
By using more than one mic to record your bass, you gain access to a wide range of new possibilities. Using the unique voices of different mic types and placements, you can make your sound range from tiny to huge, from seriously in-your-face to intimate, depending on your mood and the needs of the song. Before we get into the techniques, there’s one danger of multi-mic setups that we need to address.
Phase Issues
If you’ve read any of our other articles on recording with multiple-mic techniques, you’ll know that this is where we give you a warning about the dangers of not being careful with phase relationships between them. We don’t mess with tradition.
If you’ve ever spent any time watching waves on a beach, you’ve seen the phenomenon where two waves will collide with each other and cancel out, or suddenly become a bigger wave. The same thing happens with sound waves. The high point and low point of each wave (peaks and troughs) will reinforce or cancel each other when they’re not in sync. If the exact peak of one frequency collides with the corresponding trough of another, they add up to zero, cancelling each other out. If the difference in phase is between 90° and 270°, you get some amount of cancellation (destructive interference). On the other half of the cycle, passing from 270° to 359° and from 1° to 90°, you get some constructive interference, where the interference patterns create peaks that were not present in the original sound. Neither of these are good when you listen back to the track.
This is especially important when recording bass, because phase differences affect low frequencies much more easily than they do higher frequencies. This is because longer wavelengths have a greater range of distances in which they are out of phase. For example, the low E on a standard four-string bass has a fundamental pitch of 41Hz, which makes a single wave about 27.5 feet long. So, if you’re getting either destructive or constructive phase interference, you’ll have to move the mic a greater distance to correct for it. As an audio engineer friend reminds us, “the time interval for 1° of phase is inversely proportional to the frequency.” What that means for you, in translation from engineer-ese, is that low frequencies go out of phase faster than high frequencies, and the lower the frequency, the more quickly it happens.
There’s an old recording rule-of-thumb that dates back to the days when everything was mono called the “3-to-1” (or 3:1, if you like math) rule. In essence it says that if two mics are going to be at two different distances from a single source, the distances should be in that relationship as a starting place. So, if your first mic is an inch away, the second should be three inches away, one foot/three feet, 1.5 feet/4.5 feet and so on. While it’s never possible to be wholly free of phase interference artifacts with a multiple mic setup, using the 3:1 ratio of placement will give you a starting place to help minimize it.
A quick word also on polarity. While it’s often mentioned in connection with phase, it’s a subtly different thing. Polarity is binary, simply switching positive and negative voltages. So it’s important to use a cable tester, like the Livewire LWSCT, to make sure that all your XLR mic cables are wired to the AES (Audio Engineering Society) standard of pin 2 hot, pin 3 neutral, pin 1 ground, to avoid any issues.
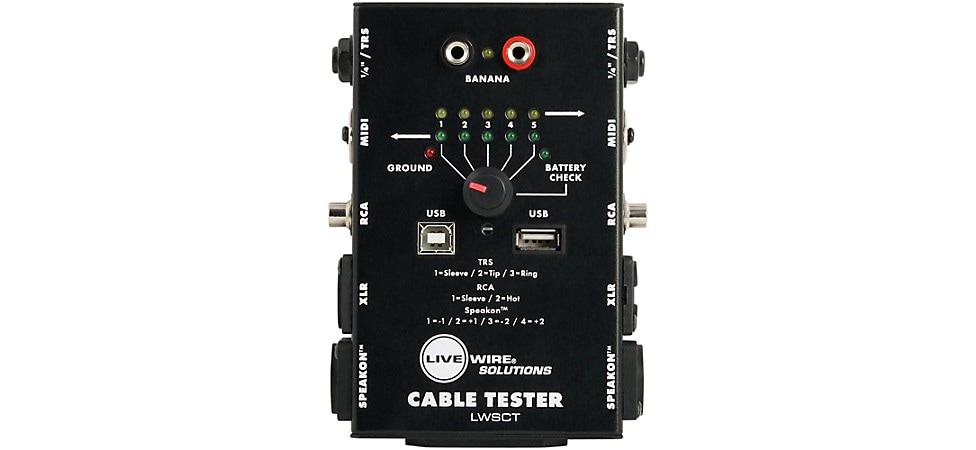
Pictured: Livewire Cable Tester
Now, about those multi-mic setups.
Setting Up to Record with Multiple Mics
Once you start working with multiple mics, your sonic possibilities multiply. Since all artists and recordists are looking for the sound that’s in their head, and that can vary from song to song, there’s no single “right” way to do any of this. So, start with these basic concepts and guidelines, then feel free to start experimenting.
With multiple mics, there are a few ways to approach mic choice and placement. For the purposes of this article, we’re limiting it to two mics at a time, just to keep it simple. The first choice is to use two of the same family of mic at different positions. The second choice is to use two different mic types at different positions. The third is to use two different mic types at the same position. Here are some specific examples to get you started. For all these examples, you can either find a mix that works for you upfront and record them to a single track, or record them to separate tracks and mix the final sound later.
For the first example, let’s use a pair of dynamic mics, say, two Audix F6s. Place the first mic about one inch from the grille cloth, on-axis aimed at the dust cover/speaker cone junction, for maximum punch and high-end response. Place the second mic pulled back one to three feet, and check for phase with the channels summed to mono, adjusting the second mic position as necessary to compensate. You should get both that immediacy of the close mic along with a sense of “amp in a room.” Since they’re the same mic, this will be more subtle than with different mic types.
Next, let’s use the same basic positioning but swap out mics. For the close position, use a dynamic, like the Sennheiser MD441U. For the distant mic, pick an LDC like the AKG C414 XLII. As always, check for phase. Experiment with the different polar patterns on the condenser. The difference in mic types should give you a sound that’s closer to what you hear in the room. Using the condenser’s figure-of-8 pattern will give you more room sound, as will pulling the mic back further. Always remember to use the 3:1 rule discussed above and check for phase every time you change a mic position. As mentioned in the single-mic section, a ribbon mic, like the Sterling Audio ST-170, can also be a great choice for the distance mic.
Pictured: Sennheiser MD441U
For our final example here, let’s grab an Electro-Voice RE20 dynamic and an AKG C414 XLII condenser, and stick them both tight up on the amp. For maximum highs, use the condenser at the dust cap position and the dynamic closer to the edge. For a little less bite, reverse those positions. This position will deliver maximum punch and maximum high-end clarity. It’s probably the most aggressive bass sound you can get with a pair of mics.
Once you’ve got those concepts under your belt, you can start doing various forms of mix and match with mics to find your personal favorite mic techniques for recording electric bass guitar. But before you run off, remember we mentioned that it never hurts to have a DI on the bass to record a track even when your miking up the amp? That leads us to the topic of hybrid recording methods.
Hybrid Recording Methods
In a way, hybrid recording (combining different recording methods for the final track) is one of the oldest methods of recording electric bass guitar. It began the first time an engineer split the signal to feed an amp and the mixing board at the same time. Advances in recording technology have made it even more versatile than ever, so let’s look at a few quick examples.
Combining the direct track with the miked tracks is the classic way. Using the direct track mixed behind the miked tracks adds clarity and definition while retaining the vibe of the mics. Using compression on one and not on the other can give you a great combination of dynamic emphasis while keeping the bottom solid.
The next simplest method is to re-amp your direct signal. As we mentioned in the section on recording with amp modelers, most of them have the ability to re-amp without having to do another digital-to-analog-and-back conversion. So, even if you didn’t do your direct recording through the modeling hardware, you can use it to reprocess the recorded track. Pro tip: Make a note of whatever settings you used on the modeler and save the preset separately, if you can, so that if you ever have to go back and revisit the track you won’t have to spend time recreating the sound.
As you can imagine, there are a lot of variations available here by the time you start to apply plug-ins for effects and amp modeling as well as external gear across multiple tracks of miked, direct and digitally processed bass guitar. Because of the nature of how small differences in timing can change phase relations, it’s especially important to always collapse to mono and check for phase cancellation when you’re combining multiple bass sources. With that in mind, making music is all about matching the real world to what you carry around in your head. So, once you’ve got a grasp on the basics, do what you gotta do to get the sound you want.
To wrap up, let’s take a look at some of the things you might want to consider to make your recording life easier.
Expand Your Sonic Horizons and Your Gear
With the concepts we’ve provided here you can seriously up your electric bass recording game, but, to get the most out of these tips, you might want to think about a few crucial studio upgrades. You might also check out our guides on Recording Electric Guitars, Recording Acoustic Guitars, Home Recording Essentials and our Audio Interface Buying Guide.
A good place to start is with doing some acoustic treatment of your recording space. Since bass frequencies have a tendency to get into pretty much everything, it’s a particular challenge when recording electric bass. Even something as simple as picking up a few reflection filters for your mics will help. For bass, you’ll almost definitely want some movable “gobo” acoustic panels, to improve isolation and help control reflections that can add to phase problems and audio bleed when you’re recording multiple musicians. Get a little more serious about your space, and you can look into a more permanent installation of treatments, including acoustic foam, bass traps and wall panels to control unwanted reflections and kill standing waves (which are a real danger if you’re recording a bass at any volume). A better sounding space helps create a more professional sound in your final mix.
Improving your headphones and headphone extension cables is a benefit for both tracking and mixing. A quality pair of studio ‘phones, closed-back and well-isolated, on a premium extension cable, helps you monitor more accurately when positioning mics, and when quality checking your mixes.
Especially for bass, amp stands and isolation platforms make a huge difference. They decouple amps from the floor, which doesn’t just help with controlling the “woof” acoustic coupling can cause. Bass makes other stuff vibrate, and, as we mentioned previously, you don’t need the sound of your mic stands rattling immortalized on your tracks.
Speaking of stands, a few studio-quality mic stands equipped with universal shockmounts will come in handy. They’re designed to hold their position while handling larger, heavier mics like a tube condenser and are way more stable. They also offer better isolation from those stray vibrations.
Turning to the control room, there are several easy upgrades. Better studio monitors and isolation pads to set them on make for more accurate mixes. Because many musicians, especially bassists, prefer to track in the control room so they can ditch the headphones, you might want to add a subwoofer as well, for the improved feel. A better audio interface with more inputs and higher-grade mic pres will expand tracking options greatly. A premium outboard mic preamp is another worthwhile investment, providing more gain and adding sound quality, especially with some of the tube-based mic pres currently on the market. A quality outboard analog compressor will also come in handy to tame signals a little before they hit your interface’s A/D converters.
Finally, you’ll probably want to build out your mic collection (usually referred to as a mic closet or mic locker) as you get deeper into recording. A good mic closet will have several different dynamic mics, a variety of condensers, both large- and small-diaphragm, with at least one stereo-matched pair of the latter, and a couple of ribbon mics. Which ones? Expect to see an article soon about shopping for recording mics.