


As you get deeper and deeper into your journey as a musician, you're going to discover a lot of new concepts and terminology. That extends far beyond just the theory, harmony and physical technique involved in learning to make music, but also—and maybe especially—to the technology that surrounds making music in the 21st century. Our intention, with this article on live sound, and other upcoming articles, is to take the most common terms and concepts you're going to be bumping into and give them some shape and perspective. We'll try not to be boring along the way.
Who is This Guide For?
Whether you're a musician who's new to performing in larger venues, an aspiring live sound engineer or just helping your friend's band out as an informal roadie, this is all stuff that you need to know. So, when someone says to you, "This should be behind the downstage left scrim," or, "I think the mult on the line-level feed from the active D.I. is out of phase. Can you check the interconnects?" you'll know exactly what they mean.
How Our Live Sound Glossary is Organized
As fond as we are of the alphabet—next to music, it's one of our favorite things—we’ve chosen to present this collection of terms grouped by different areas and functions, and in an order that lets them build on each other. We hope that this helps you build your understanding, because it's not enough just to know what a term means, but to grasp what it's for. We'll start with the place where this all happens, the live performance stage.
Table of Contents
Stage Terms
Places
Times
Gear Terms
Onstage
The PA System
Connections
Tech Terms
Audio and Acoustics
Electronics
Engineering
How to Put all of This to Use
Stage Terms
Performers all long for a stage, whether literal or figurative, but once you're there, what do you call things? Rather than just point and offer up the vague, "Over there," this section will deal with where to go, and, in addition, when to be there.
Terms Defined in this Section
Artist Call
Backstage
Beginners and Overture Call
Call Time
Centerstage
Crew Call
Curfew
Curtain
Dead Case World
Downstage
Line Check
Offstage
Onstage
Sound Check
Stage Left
Stage Right
Talent Call
Upstage
Wings
Places
Every theater and concert venue has lots of nooks and crannies, and they all, or mostly all, have names. This section is a quick map of what's what when you step out of the audience and onto the stage.
Stage Right/Stage Left
Stage directions can be confusing until you get used to them. Because the "left" and "right" are traditionally (and stagecraft is all about tradition) from the performer’s point of view, once you're sitting in the audience, everything gets flipped. When facing the stage, Stage Right is on your left and Stage Left is on your right.
Upstage/Centerstage/Downstage
Once again, the thought process here is from the audience perspective. While standing on the stage, you'd think the up was toward the audience and down away from them, but it's the opposite. Downstage is closer to the audience (and some earlier stages actually used to tilt toward the audience) and Upstage is further from. If you remember that to "upstage" someone, in theatrical parlance, is to make them turn away from the audience, that may help secure this one in your memory. At least with Centerstage, there's no equivocation. It's, well, the center of the stage. You'll find these terms get combined so you have:
Audience
|
Downstage Left |
Downstage |
Downstage Right |
|
Centerstage Left |
Centerstage |
Centerstage Right |
|
Upstage Left |
Upstage |
Upstage Right |
Onstage/Offstage/Wings/Backstage
These are a little simpler. Onstage should be obvious—it's when something is on the visible stage area. Offstage is when something is not visible on the stage, but it can generally be in one of three places: the Wings, which are the areas to the right and left of the stage that are not visible to the audience, or Backstage, which is behind whatever kind of rear curtain or wall there is behind the performers.
Dead Case World
Occasionally, a stagehand might tell you to put stuff in Dead Case World. The exact location can vary from one venue to another, but it's just shorthand for where cases, rack lids and other items that need to be out of everybody's way during the show should be stored. Similarly, you’ll find other “worlds” that designate where certain things are set up, like “Monitor World” would be where the monitor mixer sets up, “Guitar World” where the guitar tech sets up his bench and the back-up instruments, and so forth.
Times
Now that we've got the places clear in mind, let's talk for a little about when you need to be in those places. There are a number of times that can get thrown around and, if the show is going to run smoothly, you need to know what those are.
Call Time
Call Time is the time you need to be backstage, ready to get to work. Obviously, this is going to vary, depending on whether you're part of the crew or in the band. Crew Call is when the stagehands, riggers, road crew, etc. are expected to be ready to start work. Artist Call or Talent Call is when the band is expected to be there and ready to start their part of the pre-show proceedings. In theater, there are a bunch of other calls like Beginners and Overture Call, which is five minutes before the curtain is supposed to raise. But most of the theater calls are generally not used for music performances.
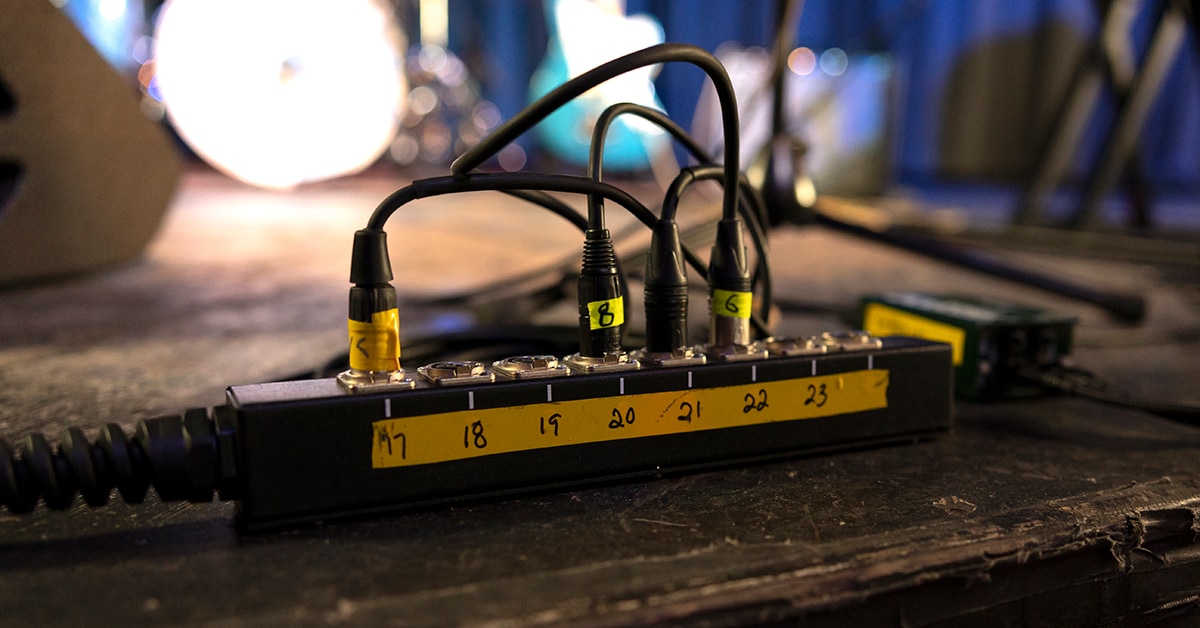
Line Check
Line Check exists for the sound crew. This is when the main sound engineer is making sure that all the cables, D.I.s, inputs and such are working and connected to the correct channels. While we're here, a quick word about "Check, 1, 2, 3." This phrase, so commonly heard at your local club, is really supposed to be "Check, <number of the input channel to whch the mic is supposed to be connected>" rather than a series of numbers. Go to a show in a large venue, and what you'll hear is the crew member onstage saying, "Check 1, Check 1, Check 1," until they get a thumbs up from the sound engineer to move on to, "Check 2, Check 2, Check 2," and so on.
Sound Check
Sound Check is when the band (or bands) get to make sure their sound is going to be right for the show and the monitor and mix engineers get to massage the mix for the venue. If you're an opening band for a show, it may just be a very quick thing or not happen at all, if the headlining act ran over their scheduled sound check time.
Curtain
Curtain is the time the artists are supposed to be on stage and the show begins. In our experience, for many rock ‘n’ roll shows, this is seen as more a suggestion than a definite.
Curfew
Some venues, especially outdoor ones like the Hollywood Bowl and Greek Theater in Los Angeles, will have a Curfew. This is the time by which the music must end to avoid bothering the neighbors.
Gear Terms
Now that we've taken a look at where you'll be, and when you'll be there, it's time to examine the gear that will be surrounding you.
Onstage
There are a lot of things on the average concert stage that aren't the band equipment. Here's a quick list of them.
Terms Defined in this Section
D.I. Box
Floor Wedge
IEM
In-Ear
Microphone
Scrim
Side Fill
Snake
Splitter
Stage Box
Monitors
Monitors are how the band hear themselves, as well as each other. There are several different types. If you want a much more in-depth look at monitor systems, you might consider checking out our "Ultimate Guide to Stage Monitoring" article.
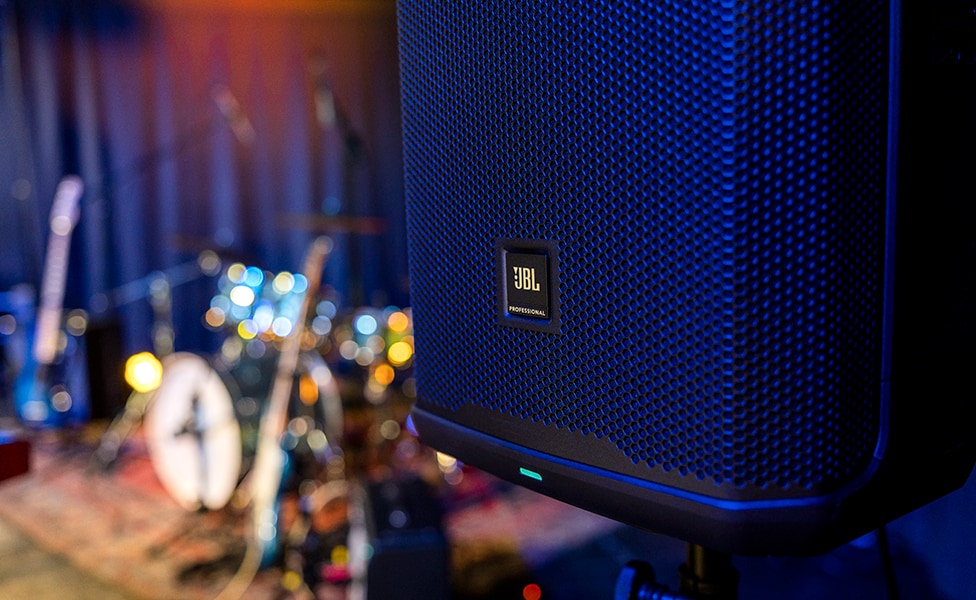
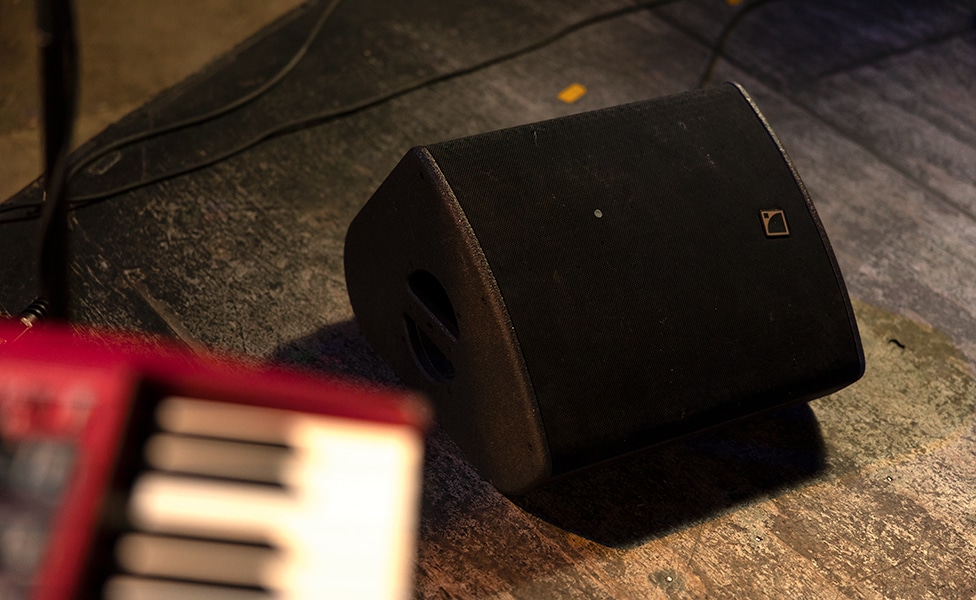
Floor Wedge
Floor Wedges are generally two-way (separate drivers for high-frequency and low-frequency sound) speakers in boxes designed to angle them up at the performers. They can be either passive, requiring a separate power amp, or have internal power amps and other electronics. Many singers also seem to think of them as footrests.
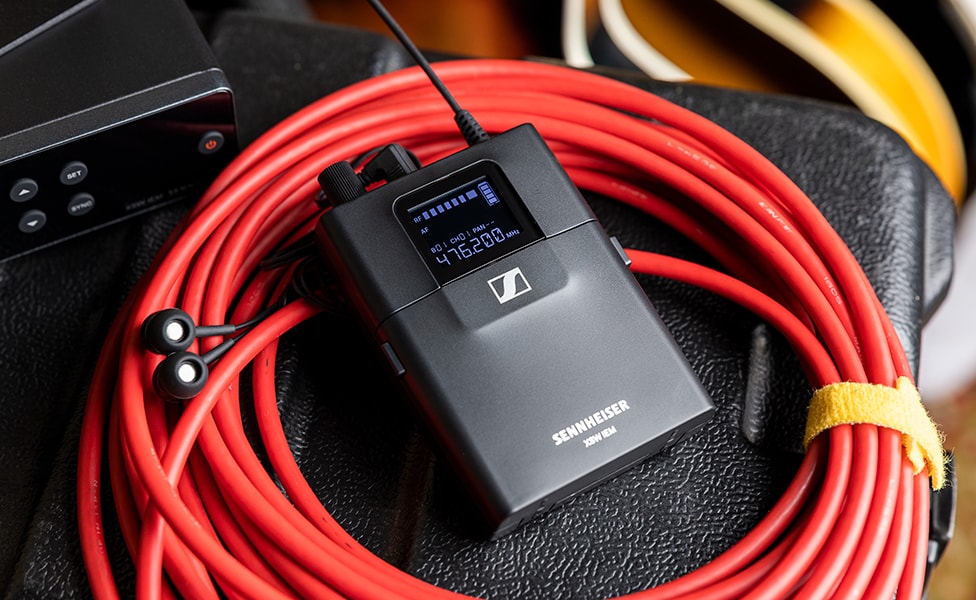
In-Ear/IEM
In-Ear Monitors, or IEMs, are exactly what they sound like—a sophisticated take on the earbuds that came with your mobile device. They can range from exactly those entry-level earbuds to custom-fit, molded multi-driver monitors. They're connected to a wired or wireless belt pack, and fed the monitor mix.
Side Fill
In some cases, with performers who like to move around a lot on stage and don't like to use IEMs, you'll find Side Fill monitors. These are small speaker cabinets at the sides of the stage that wash the stage with sound so that, even if you're not in front of a floor wedge, you can still hear everything.
Microphones
A Microphone is a type of transducer (something that turns one form of energy into another, in this case sound energy into electrical energy). You probably already knew that, but we suggest that you check out our articles on how different types of microphones work to learn more. We've got one each for dynamic, condenser and ribbon mics. There are also buying guides for live vocal mics, instrument mics, and a good article on tricks for miking a live band.
Miscellany
Rounding out this section, here's a little bit about the other things you'll find lying around the stage.
Stage Box
The Stage Box is where all the mic cables plug in on stage. There can be one big box, multiple sub-snakes attached to the main stage box, each with their own mini stage box, or, with digital systems, a digital stage box that does the analog-to-digital conversion right there, and just sends data to the mixer.
One other type of stage box you might encounter is the Splitter box. Used for live recording—less so now that many live sound boards have internal recording capability—or when there's a separate monitor mixer, the splitter does exactly what you'd expect from the name, splitting each incoming signal into two identical versions. There are two basic types: Passive, which is simply "Y" connections, and transformer-based, which isolates the two signals and can also give a slight boost to make up for the signal level that's inherently lost in a passive split.
Snake
A Snake is a long, multi-conductor cable that carries all the signals from the stage to the mixing board. With many digital mixing boards, this is likely to be an Ethernet cable carrying data as the audio is converted to digital signals at the box.
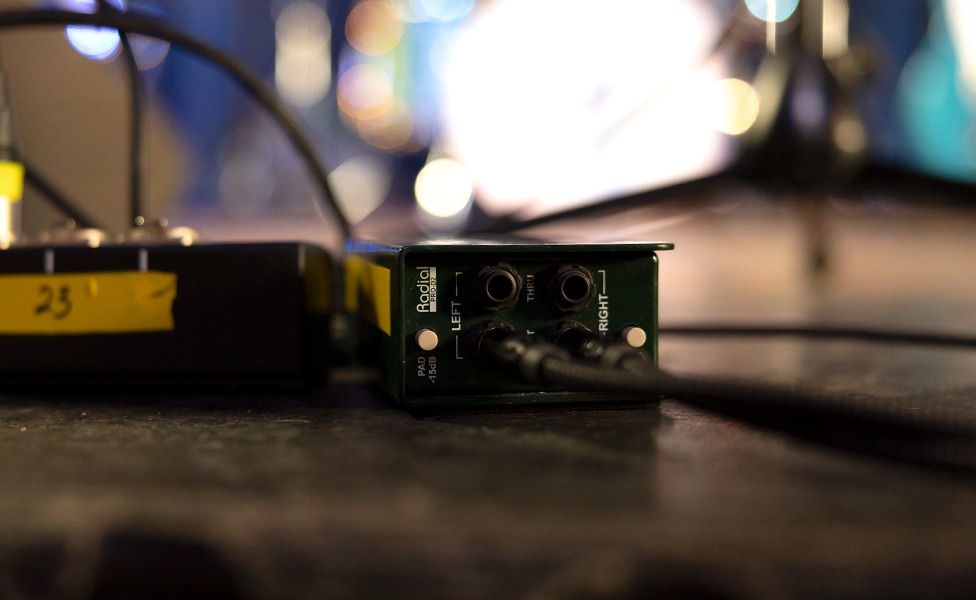
D.I. Boxes
A D.I. Box (or Direct Injection Box) is designed to take a relatively high-impedance (and we'll get to impedance in the section on tech terms) signal from an instrument, like a guitar, bass, keyboard or other electric instrument, and convert it to a balanced low-impedance signal that can travel from the stage to the main mixing board without losing any frequency content. They can be passive (non-powered) or active (powered). Active D.I.s are frequently phantom powered (see our Riffs article, "What Is Phantom Power and How Does it Work").
Scrim
The one non-electronic item here, a Scrim is simply a screen that's used to hide things you don't want the audience to see. It can be plain or painted as part of the stage set.
The PA System
We've broken out this section from the Onstage section because, while PA systems used to be onstage, frequently they're flown (suspended) or placed offstage.
Terms Defined in this Section
Array System
Column Array
Compression Driver
Line Array
Motors
Point Source
Power Amplifier
Trapezoidal Cabinets
Traps
Speakers
Without speakers, there would be no live sound. Well, maybe megaphones would still be in, but there go arena shows. Anyway, speakers and the cabinets in which they're placed are key to the whole sound reinforcement concept, so let's take a moment to discuss them.
Motors
You'll frequently hear audio engineers refer to Motors. They are talking about the concept of a motor as a driver of something and, in reality, a speaker is a DC Servo Motor. It's like this: The speaker cone is the motor's rotor (only it goes back and forth, rather than round and round), and the coil is the motor's stator. When an electric current is applied to the coil, the created magnetic field interacts with the magnetic field of the permanent magnet, causing the speaker cone to move. The faster the current changes, the faster the speaker cone moves.
Compression Drivers
A subset of the speaker/motor is the Compression Driver. A compression driver is a type of loudspeaker where a small diaphragm is used to produce high-frequency sound waves. Compression drivers are often used in conjunction with a horn, which assists to further amplify and focus the high-frequency sound waves.
Cabinets
Now that we know something about what goes in them, let's take a look at a couple of the different types of cabinets you'll find sitting just offstage.
Trapezoidal Cabinets
While many old-school PA cabinets are square or rectangular, these days you'll usually find Traps or Trapezoidal Cabinets. The advantages of this cabinet structure are more even dispersion, reduction of internal standing waves in the cabinet and increased internal volume for better low-frequency response.
Point Source
A Point Source is what most traditional PA systems are—a speaker that acts as a single place of origin for sound transmission. These might be 2-way (woofer/tweeter), 3-way (woofer, mid-range driver, tweeter) or 3-way plus a separate subwoofer. Relatively portable and easy to set up, they are great for smaller venues but don't scale quite as well to large venues as our next topic.
Array Systems
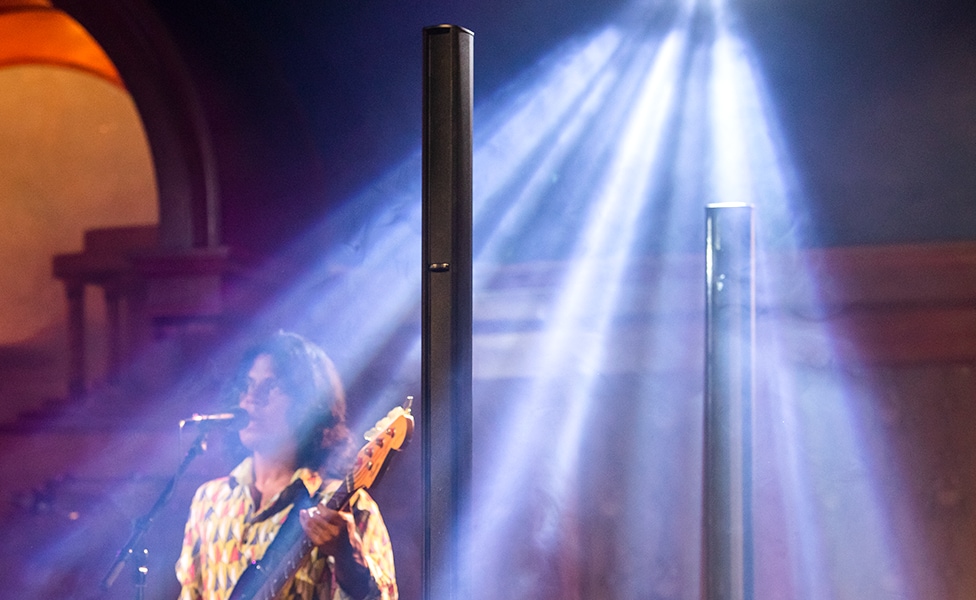
In modern sound systems, you'll frequently run across the concept of speaker arrays. What do we mean by Array Systems? Simply put, an array system uses a large number of the same size speakers, fed in phase, that are placed closely enough together that their interference patterns (the way the sound waves coming out of individual speakers collide and react with each other) are constructive rather than destructive. This creates a wider coverage pattern and higher sound pressure levels (SPL).
You'll find two distinct types of array systems—Line Arrays and Column Arrays. The principal visible differences are in how the speakers are arranged. A line array has pairs of speakers arranged one next to the other, then multiple pairs stacked vertically in a curve. A column array has the speakers stacked in a fixed vertical column. Each has advantages and disadvantages, but in the simplest terms, a line array has wider, more even vertical coverage and slightly better low-frequency response, when a column array has more even horizontal coverage, at the cost of slightly less robust low-frequency response. You'll see line arrays in big concert venues where there is a lot of variation in audience altitude (floor, balcony, bleachers, etc.) and column arrays in smaller venues where you want to cover the breadth of the audience with fewer speakers.
Power Amplifiers
You are, most likely, already familiar with what a Power Amplifier is, as just about every piece of music gear gets run through one sort or another. But a quick look at the different classes of amplification is probably worth a quick stop along the way.
Class-A:
Class-A amplifiers are the most linear and provide the best sound quality. They work by passing the entire signal through the amplifier, which means they are always on. This makes them the least efficient, and hottest-running type of amplifier, but it also means they produce the most accurate sound with the least amount of distortion.
Class-B:
Class-B amplifiers are a pure push/pull circuit where two output devices each amplify exactly half of a waveform—either the positive voltage half or the negative voltage half. They are more efficient than Class-A, but, because of the abrupt change from one device to the other, they are prone to what's known as "crossover distortion." You will rarely ever encounter a Class-B amp in a pro audio environment.
Class-AB:
Class-AB amplifiers are a modification of the Class-B push/pull amplifier. They are a compromise between Class-A and Class-B, being more efficient than Class-A amplifiers, but with less crossover distortion than Class-B. They work by turning on one output device when the signal is positive and the other transistor when the signal is negative. A slight bias voltage actually turns them on/off just before they hit the 0V crossover point, which is what reduces the previously mentioned crossover distortion.
Class-C:
Class-C amplifiers are the most efficient type of amplifier. They work by turning on a transistor when the signal is above a certain threshold and turning it off when the signal is below that threshold. This allows them to be very efficient, but it also introduces a lot of distortion. Which is why they're included here as a reference for the sake of completeness, but you will never see one in an audio application. Seriously … never.
Class-D:
Class-D amplifiers are the newest type of power amplifier, starting to appear everywhere from giant sound systems to guitar and bass amplifiers. They are extremely efficient and lightweight. While not quite up to the linearity of a Class-A amp, they provide very good sound quality. They work by switching transistors on and off very quickly to create the amplified signal. This allows them to be very efficient, and the switching can be done very quickly to minimize distortion. Class-D amps are sometimes referred to as "digital" amplifiers, but that's not really accurate. Properly, they are switching amps.
To sum up, of the amps generally used for audio, Class-A amplifiers provide the best sound quality, but they are the least efficient and tend to run very hot. Class-AB amplifiers are a good compromise between sound quality and efficiency. Class-D amplifiers are extraordinarily efficient and light while providing very good sound quality. This is a principal reason why they are increasingly the amplifier Class-of choice for touring sound companies.
Connections
A life in sound reinforcement can be defined as a long series of plugging something into something else, and then, later, unplugging it. Here are some of the most common types of cables and connectors you're likely to run across.
Terms Defined in this Section
Cable
Interconnects
powerCON
RCA
speakON
TRS
TS
XLR
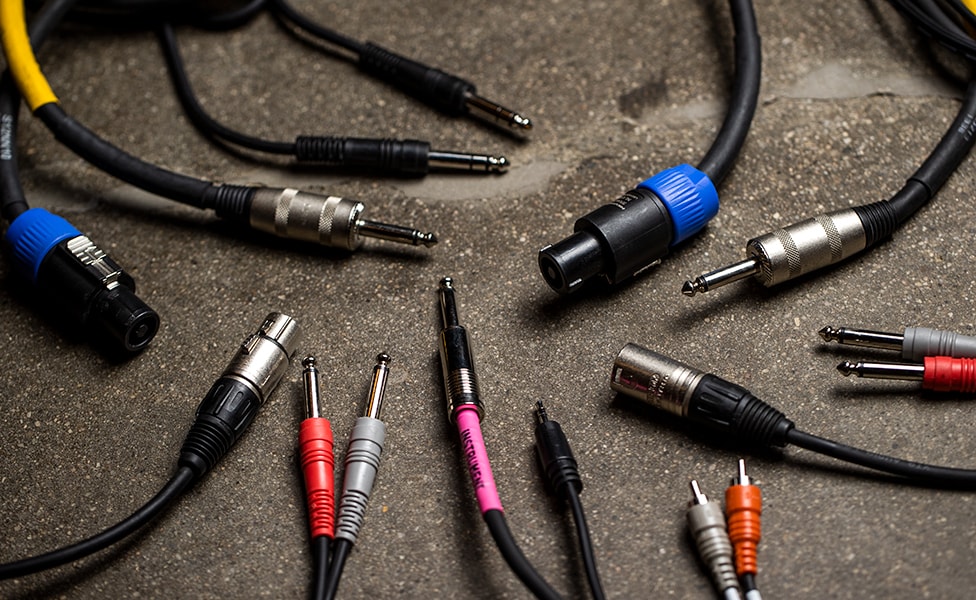
Cables
There are three types of Cable you're likely to run across on a live sound stage. Unshielded, two-conductor cable is used for high-voltage/high-current connections like speaker cables. Shielded, single-conductor cable is used for unbalanced line- and instrument-level, like guitar cables and many direct-to-amplifier connections for keyboards and other instruments. Shielded, multi-conductor wire is used for balanced (two conductors plus shield) mic- and line-level signals or snake cables (could be 80 pairs of conductors, plus shielding for a 32-channel snake with eight return sends). Cables are also referred to as Interconnects in some circles.
Connectors
Along with the different types of cable, you'll find a number of types of connectors, both as plugs and jacks (sometimes informally called "gazoutas" and "gazintas," because they go out of this and go into that). Here are the most common.
XLR
Originally developed by Cannon Electric, and originally known as the Cannon plug, the XLR connector (and associated jacks) are most commonly found in their three-pin variant in pro-audio use. These can be used either for a balanced connection (about which see the Electronics section in "The Tech") or for running an unbalanced stereo connection on a single cable. You'll also find 5-pin XLR plugs and jacks in the world of DMX-controlled lighting fixtures. Don’t confuse the two types of cable, though. DMX cables may look like a mic cable, but they are 75Ω rather than the 50Ω of a mic cable, and are designed to carry digital signals rather than analog audio.
As a side note, while there have been a number of retro-logic reinterpretations of just what "XLR" stands for, the nomenclature is, in fact, derived from the original Cannon design, which was called the X connector. The "L" stood for “Locking/Latching,” and the "R" was for "Resilient," which originally referred to an internal rubber insulator. Terms like "eXternal Line Return" and such are attempts to make more sense out of the name than it originally had, since "X" never really stood for anything in particular.
TRS
TRS refers to Tip/Ring/Sleeve and are most commonly used for stereo signals, although they have found increasing use for balanced line-level connections. Usually 1/4" plugs and jacks, you'll also find that 3.5 mm TRS plugs and jacks are used for headphone and other stereo connections on things like wireless body packs and AUX inputs on compact mixers.
TS
TS, or Tip/Sleeve in pro audio, are almost always the 1/4" version, like you'll find on plain old guitar cables—unbalanced and unabashedly mono.
RCA
RCA or Phono connectors are non-locking, unbalanced connectors that are descended from the ones everybody used to plug in their turntables and cassette decks to their "hi-fi." Still used on some DJ gear and compact mixers, they are basically just a friction-fit solution to a connection. They tend to be less reliable for touring use. Because of the wear on the connectors from constant, necessary plugging and unplugging, and an increased susceptibility to electronic noise, finding alternatives is a good idea.
speakON
speakON connectors were developed by Neutrik as a locking, high-current-capable speaker connector. They've become very widely used in touring audio systems because of their ruggedness, reliability, ability to handle multiple speaker connections in a single physical connector and capacity to handle the kilowatts of power a big touring system demands. They have also become very widely copied as "Twist-lock Speaker Connectors" from other manufacturers. You'll also find them more and more in high-end home audio systems.
powerCON
powerCON is another Neutrik-developed, locking connector, this one for AC power. As with the speakON connectors, there are also many clones out there. Shop carefully. These are a great idea, as tripping over the power cable will no longer unplug your entire system.
Tech Terms
We've looked at the places, times and gear, so it's time to get to work on some of the technical terms you'll hear being thrown around by the sound crew. While we'll try not to get too technical (no math, we swear), these are all concepts that will come in handy along your musical journey. Let's start with some basic terms in audio and acoustics.
Audio and Acoustics
Sound—it's really what it's all about. But a lot of jargon and technical terms get tossed around in the world of pro audio and on the performance stage. In this section, we'll attempt to clarify the most common terms you're likely to hear from audio professionals in your local venue.
Terms Defined in this Section
Band-Pass Filter
Bandwidth
Clipping
Compression
CPS
Decibel/dB
Distortion
Dynamic Range
EQ
Equalization
Fixed-Band EQ
Frequency
Fricative
Gain
Graphic EQ
Headroom
Hearing Fatigue
Hertz
Noise Floor
Notch Filter
Parametric EQ
Phase
Pink Noise
Plosive
Q
Shelving Filter
Sibilance
Speech Transmission Index/STI
Standing Wave
White Noise
Decibel
Decibel or dB, as used in audio, is a unit of measurement designating sound intensity, or SPL (Sound Pressure Level). It's a logarithmic unit, meaning that a change of 10dB represents a ten-times increase in sound intensity. As an example, a whisper is about 20dB, while a rock concert can be about 120dB or higher. It is also a relative measure, which means that, properly, dB is always expressed in relation to some standard, as with dB SPL in the example given here. See also dBu, dBv, dBm and dBV in the Electronics section.
Frequency
Frequency is, quite simply, how many times something vibrates through a full cycle (from zero to the maximum positive and negative values, and back to zero) within a given time period. For audio, the standard measurement is given in Hertz, named after German physicist Heinrich Hertz and abbreviated as Hz or in kilohertz (kHz) for higher audio frequencies. The standard range of human hearing is generally held to be 20Hz to 20kHz. You may also occasionally see it stated as CPS (cycles per second).
Bandwidth
Bandwidth is the range of frequencies being referred to. It can be either absolute (as in 20Hz–20kHz) or relative (5kHz bandwidth, which could be from 1kHz–6kHz or 12kHz–17kHz, depending on what you're doing).
Phase
Phase in audio is a measure of how far along a sound wave is in its cycle. It is measured in degrees, with 360 degrees being one complete cycle (see Frequency). Two sound waves that are in phase will have the same starting point, while two sound waves that are out of phase will have different starting points.
Phase can have a big impact on the sound of a recording or live performance. If two sound waves are in phase, they will add together to create a louder sound. However, if two sound waves are out of phase, they will cancel each other out, creating a quieter sound. Here are some of the other phase-related terms you'll hear.
In phase: The two sound waves are aligned so that they are adding together to create a louder sound.
Out of phase: The two sound waves are misaligned so that they are canceling each other out to create a quieter sound.
Phase shift: A change in the phase of a sound wave.
Phase cancellation: The cancellation of two sound waves that are exactly 180° out of phase.
Phase alignment: The process of aligning two sound waves so that they are in phase.
Comb filtering: The boxy sound you hear when sound waves are out of phase.
If you want some serious tips about how to avoid phase problems, check our article, "What Causes Phase Cancellation and How to Fix It."
Standing Wave
Related to phase, a Standing Wave is a wave that appears to be standing still, even though it is actually vibrating. It is created when two waves of the same frequency travel in opposite directions and interfere with each other, as might happen with echo from the back wall of a performance venue. The standing wave has nodes, which are points where the wave has zero amplitude, and antinodes, which are points where the sound waves reinforce each other, increasing their maximum amplitude. Standing waves can be created in any medium that can transmit waves, including air, water and strings.
Pink Noise/White Noise
White Noise and Pink Noise are sounds generated from the entire audible frequency spectrum. Both can be used to do frequency response analysis on a sound system or audio setup. The difference between them is that white noise uses equal power per frequency, where pink noise is generated with equal power per octave. Because of the nature of how human ears work, this makes white noise sound "hissier" and pink noise sound smoother. The initial stages of "ringing out" a sound system can involve injecting white noise or pink noise into a mixer channel and using a spectrum analyzer to look for obvious nodes, antinodes and resonances to adjust for with EQ.
EQ
While EQ, or equalization, is often thought of simply as some sort of "tone control"—like the bass and treble knobs on an amplifier—it goes a little deeper than that. When it comes to audio engineering and live sound, EQ is not so much a "thing" as it is a process. That process is attenuating and boosting (or equalizing—see where the term comes from?) different frequency ranges in the sound system or monitor system to simultaneously eliminate problems and create a clear, balanced overall sound. There are a few sub-terms here you should be familiar with, a couple of which, like frequency and bandwidth, we've already covered.
Gain is the amount of amplification or attenuation applied to a signal, usually stated in dB.
Q refers to the resonance or sharpness of the center frequency of an EQ band. A high Q is sharp/narrow, and a low Q is broader and tapers off more slowly from the center frequency.
Fixed-Band EQ, commonly called Graphic EQ, uses, as you might suspect from the name, frequency filters that are of a fixed bandwidth, with a fairly broad, fixed Q, except for the very lowest and highest bands (see Filters>Filter Types). The two most common versions you're likely to find in a sound system are 15-band (also called half-octave, as the filters are placed a half an octave apart) and 31-band (third-octave, for a similar reason).
Parametric EQ allows you to change the parameters of the EQ (see what they did there?), generally letting you shift the center frequency of an EQ band and broaden or narrow its Q. Usually found in four-band or five-band units, these are great for feedback control and for narrowing in on one specific problem frequency.
Filter Types
The Band-Pass Filter and Notch Filter are mirror images. Both zero in on a specific range of frequencies. A band-pass filter rolls off the frequencies outside that band, where a notch filter rolls off the frequencies inside the band. Pro Tip: If you want to emulate a telephone or megaphone, instead of dragging out a bullhorn on stage (as cool as that can be) a properly adjusted band-pass filter is your friend.
A Shelving Filter should be fairly self-explanatory. It's designed to roll off the frequencies on one side or the other of a specific frequency range, leaving the frequencies "on the shelf" untouched. There are two general types of shelving filter: 1) A Low-pass Filter which allows everything below a certain frequency to stay on that shelf and rolling off the frequencies above it; 2) A High-pass Filter does the opposite, rolling off everything below the shelf. If the frequency rolloff is fixed, it's generally 12dB/octave.
Clipping and Distortion
Clipping occurs when a signal needs more voltage than is available to amplify it, or, conversely, provides more voltage than the input can handle. It's called "clipping" because, since the signal can't go past the available limits of the circuit (called the "rails," because, like train tracks, they define the limits of travel available), the top and bottom of the waveform get clipped off, as if the voltage thresholds were a pair of scissors. This clipping may not always be audible, as sometimes what clips can be outside the frequencies we hear, but it can still cause problems elsewhere in the electronic circuitry.
Distortion is a similar phenomenon, but it can be caused by a variety of other factors, like a faulty electronic component, bad circuit design, impedance mismatch or other factor. The end result is that the sound is not accurately reproduced. When it happens in your fuzz pedal or your amp, distortion can be a good thing. When it happens in your PA or monitor system, it's not.
Headroom
Headroom is the available space to get loud without clipping or distortion. Usually, headroom is considered to run out at 0dB.
Dynamic Range
A system's Dynamic Range is a measure of the distance between how loud it can get before distorting, and how soft it can get before the sound goes below the Noise Floor. The noise floor is where the internal noise that is inherent to every amplification system begins to cover up the signal you are trying to reproduce.
For reference, the dynamic range of 16-bit CD-quality audio is about 96dB, 24-bit audio is 144dB and human hearing averages about 120dB. 32-bit, floating-point audio is an astounding 1,528dB, which, considering that dB is a logarithmic scale, might just be enough to rip a hole in the space-time continuum and let in the monsters, so keep an eye on that volume control.
Compression
Compression is a means of making soft things louder and loud things softer—in other words, it squeezes the dynamic range. While many guitarists and bassists are familiar with compression from the plethora of pedals, it’s especially useful in live sound for singers whose mic technique is erratic or instrumentalists whose range from soft to loud would mean that you would need to be constantly riding the fader on their input channel for them to sit properly in a mix. Compression is frequently misunderstood, hence either over- or under-used. Check our article "Five Compressors Everyone Should Know" for some more detail.
Plosive/Sibilance/Fricative
Plosives, Sibilants and Fricatives or P, B, S, with F thrown in for good measure, are the sounds that cause the biggest headaches for audio engineers. They're why someone invented pop filters.
Hearing Fatigue
Hearing Fatigue describes the loss of hearing acuity that comes from either long periods of intense concentrated listening and/or listening at too high a volume level. It's characterized by loss of the ability to accurately distinguish high frequencies and a narrowed dynamic range. It's why you need to both watch the volume and take a break every once in a while to refresh your ears.
STI
The STI, or Speech Transmission Index, measures the quality of speech transmission. It's a purely objective measure which rates speech intelligibility on a scale of 0 to 1. An index of 1 means that speech has perfect intelligibility, and lower values means that the quality of speech intelligibility is degraded. STI is used to evaluate sound reinforcement systems in auditoria (Hey—a new Latin plural for you!) and performance venues, as well as general communications systems.
Electronics
Basic knowledge of electronics terms will definitely come in handy along the way. They not only help you communicate more effectively with sound crew and other musicians, but they also help you gain a better understanding of your own equipment. So, let's dive in.
Terms Defined in this Section
Active
Balanced
dBm
dBu
dBv
dBV
Ground
Ground Lift
Ground Loop
Impedance
Instrument Level
Line Level
Mic Level
Ohm
Passive
Phantom Power
Unbalanced
Watt
Ground
As those of us who have dabbled in electronics as a geeky hobby have come to understand, Ground is one of the most important concepts to get inside those pesky brain cells. Electrical and electronic ground serve multiple purposes. First, ground is a reference point against which voltages and other circuit properties are measured. Second, ground serves as a common return path for elements in a circuit, ensuring that all electrical current is moving in the same direction. Third, and vitally important in high-voltage/high-current circuits, it provides a path to earth (which is where the concept of "ground" first came from), ensuring that electrical currents have an easy way out, through cables and not through you and your mic or instrument. When there are multiple paths to ground or no easily accessible ground, that's where the trouble starts.
Ground Loop
If there's a persistent hum in your audio that you can't seem to get rid of easily, you may just have a Ground Loop. This is where there is more than one route to ground. Because electricity, like water, is "lazy," it always wants to take the easiest path to its rest state, which is ground. So, if there are multiple paths available, and one is through the hot lead of an audio cable or runs the "wrong" way through a low-voltage audio circuit, that will be the current's chosen route. One example is that some audio components use what's called "chassis ground," where the ground connection is directly to the metal chassis of the device. Others use a "signal ground." This may, or may not, be linked to chassis ground. Multiple devices in a rack, for example, can share a common connection (the metal rack rail that they're all attached to) that may conflict with the grounding setup of individual devices. So, knowing how your grounds are connected and making sure that there is one, and only one, path to ground is vital for a hum-free audio setup. For some additional info, check our article "How to Fix Hum, Buzz and Other Noise in Your Audio Cables."
Ground Lift
You'll see a lot of equipment, especially things like D.I. boxes, with a button or switch labeled, Ground Lift. This disconnects that ground for that specific device, and sometimes that is the solution to break a ground loop. Ground lifts should be used with care, however, and as a last-ditch attempt to solve a hum or noise problem. As an aside, never remove that third prong from an AC plug, as it's a safety feature. If the only outlet you have to plug into is a two-prong, ungrounded outlet, there are other problems that need addressing with that circuit. In the worst case, you should have a couple of three-prong to two-prong AC adapter plugs in your kit for use in absolute emergency situations. And even then, be careful. Electricity can be fun, but it can also be dangerous.
Ohms
The Ohm, named after German physicist and mathematician Georg Ohm, is a measure of electrical resistance, or, in very simple terms, how hard the electrical current/signal has to work to get through the cable or circuit. Ohm is usually represented by the Greek letter Omega (Ω). Resistance is measured by the amount of voltage drop across a component or circuit, divided by the amount of current (we know, we promised "no math," so we’re just tossing that out there). As a simple analogy, it's like friction on a surface, the more friction/higher the resistance, the harder it is to do. This is also a good analogy because friction creates heat, and electrical resistance can create what's called "waste heat."
Impedance
In most audio electronics, unless you're actually digging in with a soldering iron and fixing stuff, the place you'll most often find ohms mentioned is regarding Impedance. Since both resistance and impedance are measured in the same unit, you may be wondering if they're really the same thing. The two are related, but different in important ways. Straight resistance is a measurement related to DC voltage, where impedance is a measurement related to AC voltage.
What's the difference? DC (like from a 9V battery), because it doesn't have a waveform associated with it, has only the voltage, or magnitude, to deal with, so a particular resistance remains pretty much unchanged. AC, because it has 360° of cycling in a waveform (even just a pure 50/60Hz electric current from the wall) also has to deal with a phase angle in the signal along with the voltage itself. That phase angle changes with the frequency of a waveform, which means that the impedance also changes with frequency. This is why impedance is generally measured at a specific frequency, which for audio items, like speakers, cables and output devices like tubes and transistors, is standardized at 1kHz. Why 1kHz? Because it's relatively omnipresent in audio use, and it's high enough that the resistance of the individual conductors doesn't come into play, and low enough that any resonance of the conductors themselves doesn't affect the measurement.
Watts
Watt is a unit of power, measuring the rate at which energy is transferred, or, in simpler terms, how much work can be done in a given amount of time. James Watt, steam engine, yada yada. In the audio world, the thing to remember is that amplifier output is measured in watts, a linear measurement, where audio output is measured in decibels (dB), which are logarithmic. So, your 100W guitar amp, to go from 110dB to 120dB, would need to become a 1,000W amp. It's probably better, though, to tell the rest of the band to just turn down a little.
Active/Passive
Passive and Active devices like D.I. boxes and speakers are another frequent reference. Simply put, a passive device is one that does not require applied power to operate beyond the voltage and current present in the regular audio signal. An active device requires power for internal components. Many devices will get this via our next item, phantom power.
Phantom Power
Phantom Power, as we say in our article "What Is Phantom Power and How Does It Work?" is "a way of remotely powering gear in a way that is ‘invisible’ in that it has no effect on the audio signal that's traveling over the same cable." If you want some deeper detail, we highly recommend checking out that article.
Signal Level
One of the most important things to track when you're hooking up various audio gear is that the signal levels that are coming out of a piece of gear match up properly with the gear you're plugging it into. There are three basic signal levels you'll encounter. Here they are, in order of signal strength.
Mic Level
The lowest signal levels, from microphones, tend to run from -60 to -40dBV (more about this in a second), and require a preamp to be increased to line level to be of practical use.
Instrument Level
Signals from electric guitars, basses and various other instruments generally run from -20 to -10dBV and require a preamp, though not as much of one as for mic level signals.
Line Level
Signals from most pro audio gear will run from -10 to +4dBu (huh? What happened to the "V"? We'll get to that) and can directly drive a board channel without a preamp, or even directly feed an amplifier input.
So, about minding our "V"s and "u"s …
dBV vs. dVu, with a side trip to dBm
So, what's up with "u" and "V" when they're appended to "dB?" As we mention in our Decibel entry in the Audio and Acoustics section, dB is a ratio stated in relation to a particular standard. There we used dB SPL as the measurement. Here we're looking at dB in relation to a voltage standard, rather than sound pressure. When stated as dBV, it's in relation to 1V, but when it's dBu (the "u" stands for "unterminated"), it's in relation to 0.775V. This means that a signal of 0dBV is actually 0.225V higher than a signal of 0dBu, and the pro audio standard of +4dBu is not 14dB higher than the consumer audio standard of -10dBV, but really only about 12dB different. Occasionally you'll see dBm, which is power-based rather than voltage-based, where the "m" stands for milliwatt.
To add to the confusion, you'll also see dBv, with a lower-case "v." Although it's still being measured against one volt, when it's lower case, it means that it's referring to a 1V AC signal into 600 ohms. The takeaway from all this should be, know your gear and match up your "u"s, "v"s, "V"s and "m"s.
Balanced/Unbalanced Line
You'll frequently see references to Balanced and Unbalanced lines. What are they, what are the differences and what is your best choice?
An Unbalanced Line uses a single conductor, plus a ground or shield, to carry a signal. Looking at the most common unbalanced cable, you'll find on stage—the standard 1/4" guitar cable—you'll see a center conductor, which is the main signal source, and a braided wire (or sometimes foil and a wire) that acts as both a ground and a shield. Unfortunately, since it's also carrying part of the audio signal, this outer braid can, in electrically noisy environments, pick up radio-frequency interference (RFI) and electro-magnetic interference (EMI) through inductance. This can be attested to by anybody who has set their cellphone too close to an unbalanced cable. Unbalanced lines are generally fine for runs of up to 15–20' with an instrument level signal, but longer than that, or in a very electrically noisy space, pushing beyond those limits is just asking for hum. Pro Note: It’s always a good idea to keep your audio lines, especially unbalanced ones, away from power cables and lighting cables. On a stage, gaffer’s tape is your friend to make sure they stay put. If they must intersect, make sure they cross at right angles to decrease the amount of noise that can be injected into the audio signal by induction.
A Balanced Line uses two center conductors, plus the ground/shield wrap. Both center conductors carry the identical audio signal, only one of the signals is 180° out of phase with the other. At the receiving end, the signal polarity is flipped back. "Big deal," you say. But it is, because any noise that may have been induced into those signals along the run of the cable will be identical on both conductors. When the polarity is flipped back, the noise is suddenly 180° out of phase with itself, and, as we discussed in the section above on phase, cancels itself out, vanishing back into the mist. This is also known as "Common-mode Rejection."
Engineering
Look out from the stage and there, somewhere in the middle distance, you see the FOH (Front Of House) engineer and sound board. In larger venues, look to the wings and you'll see, in all likelihood, the monitor mixer. If you're the band, they can be your best friend, because no matter how great you sound on stage, they are the ones who get that out to the audience (and, for the monitor mixer, back to you). So, let's take a closer look at some of the terms you'll run into when communicating with your new BFFs.
Terms Defined in this Section
AUX
Channel Strip
Console
Cue Mix
Front Of House (FOH)
Matrix Mixing
MIDI Clock
Monitor Mix
Mult
Noise Gate
Off-axis
On-axis
PFL
Preamp
Ring Out
Scene
Signal Generator
SMPTE
Spectrum Analyzer
Stage Plot
Sync
The Sound Guy
Tuning the Room
FOH/Front Of House
While Front Of House (FOH) is where the principal sound engineer does their work during the show, they're also directing things like mic placement and channel assignments when the stage is being set. Before we dive into the various parts of that job, though, let's get one misnomer out of the way.
All too often, you'll hear the FOH engineer referred to as The Sound Guy in an almost dismissive way. Even if we disregard the fact, and we certainly shouldn’t, that many of the best audio engineers we've worked with are not "guys," we're still left with the fact that a pro audio engineer has put as much time and work into learning and honing their skills as any virtuoso musician has put into mastering their craft. Plus, they use math and physics on a daily basis. They are worthy of your respect and cooperation. So, please, ditch "sound guy," and work with them to make sure your band sounds as good as it possibly can.
Setting the Stage
Before the show starts, before sound check, the head sound engineer will be directing the crew in placing mics and assigning inputs, usually according to a Stage Plot (a diagram provided by the band’s tour manager). Of course, a headline touring act will have this mostly mapped out in advance, with minor changes from venue to venue, but lower down the ladder, things will be done a little more on the fly.
Mic Placement
Getting the right mics placed in the right spots is critical. For instruments and amplifiers that don't run direct or use D.I. boxes, how good you sound will rely on this. There are two basic ways to place a mic.
On-axis mic placement means the mic is placed pointing directly at the amp or instrument. Generally, this produces a brighter, more present sound.
Off-axis mic placement places the mic at an angle. For example, a mic on an amp might be angled toward the edge of the speaker cone. Depending on the pickup pattern of the mic, this would capture a wider area of speaker movement, capturing a slightly wider tonal palette than an on-axis mic would. Sometimes the two techniques are combined for a fuller sound that's still bright and present.
Ringing Out the System
The audio engineer will also tune and Ring Out the room. This process involves several steps, starting with using a Spectrum Analyzer—which offers a visual interpretation of audio—and a Signal Generator—which outputs individual frequencies and various forms of pink and white noise—to "shoot the room," using an EQ to make the overall response as flat as possible (or match the engineer's preferred EQ curve). This is Tuning the Room. The engineer will then ring out the room, raising the master volume level to a point just shy of feedback, then raise the level on a specific mic to the point where feedback just starts to ring (see where the process gets its name?), to find specific frequencies that might be a problem. These frequencies will be cut with a very narrow EQ band (often a third-octave graphic, but many engineers prefer the more surgical precision of a parametric EQ). After that, the master volume will be dropped back to the working level, and a quick check is done to determine if it still sounds natural.
While there are a number of automated feedback control systems available today, we've found that there's still no substitute for an experienced audio engineer doing the tuning and ringing out.
The Mixer
The main FOH mixer, also known as the Console, is the principal tool of the live mix engineer. As digital audio technology has advanced, more and more live sound boards are moving from analog to digital, or at least some sort of hybrid system that uses both.
Like any mixing board, most channels will have Channel Strips, which combine a Preamp (boosts or cuts the overall level), an EQ (frequently four bands with high and low shelving bands, and one or two parametric or quasi-parametric mid-range bands), and, in some cases, a Noise Gate (helps control bleed from other sources on stage). Some boards will also have individual compression for each channel. A channel strip will usually have a PFL (Pre-Fader Listen) button that enables the engineer to check the signal before it's attenuated or boosted by the fader, to make sure that the input signal is not clipping, and that the EQ, gate and compression are set correctly.
The input strips are also likely to have AUX sends, which are used to send signal to effects like delay and reverb, either built into the mixer or independent outboard effects units.
Most modern mixers have the ability to save the state of the board to a Scene that can be recalled from memory or saved off to a computer for later reloading into the board. This is particularly handy when you are frequently coming back to the same venues, as it can save a lot of setup time if you can just reload the settings from the last time you were there and make only minor adjustments if needed.
Another feature of many modern mixers is Matrix Mixing. This enables you to send any channel to multiple destinations, enabling easy building of sub-mixes and input groups that can then be controlled by a single fader. It pretty much removes the need for the use of a Mult, which used to be the way to configure a patchbay to send one input into multiple sends.
Sync
Many touring bands today use prerecorded Backing Tracks, which can range from stems from the studio recording to loops and sound effects that would be difficult to recreate live, to be able to duplicate that recording for an audience, along with a Click Track to keep the band (or at least the drummer, which is why you'll often see drummers wearing headphones in a live performance) in time with those tracks. These tracks will be synced using SMPTE time code, a standard created by the Society of Motion Picture and Television Engineers, and a MIDI Clock signal that drives some form of metronome to provide the click.
Monitors
The Monitor Engineer is responsible for making sure that everybody on stage hears what they need to hear to make the performance as good as possible. This might be a more involved job than the main house sound engineer, as the monitor engineer might have to provide a separate mix for each band member, plus the side fills. Some bands like a blend of floor wedges and in-ear monitors, which can complicate things even further.
Just to clarify one thing—you'll see and hear references to both the Monitor Mix and the Cue Mix. They are interchangeable terms for the same thing, with Cue Mix having moved over from the recording studio to the live stage. They both mean the feed to the headphones, IEMs or other monitors, tweaked for the individual musicians.
How to Put All of This to Use
Phew! That was a lot to cover, and you'll probably want to bookmark this article to come back from time to time and refresh your memory. We're also planning on this being a living document, so terms and explanations will be added along the way. If there's something you think we should mention or cover, please let us know, and we'll see if there's a graceful way to do so.
As always, if you have questions, you can stop into your local Guitar Center store and talk to our knowledgeable associates there, or ring up our Call Center and ask gear questions. Also feel free to explore the Riffs articles we've linked here for deeper dives into individual topics, as well as tips, tricks and guides to the things you need to know along the way. We're looking forward to hearing the music you're going to make, and glad we can help along the way.