


It's a common truism that a band is only as good as their drummer. One sign of a good drummer is having well-tuned drums. In this article, we're going to give you a head start on getting your drums in tune and sounding the way you've always wanted.
Properly tuned drums are more musical, have more punch and greater tonality. Poorly tuned drums can sound sour, not delivering a pure tone or proper sustain. A drum that's out of tune with itself will "warble," not hitting a distinct pitch and losing impact because the head and shell are fighting with each other, rather than supporting each other.
We'll be getting help along the way from the Drum Doctor, one of the world's most in-demand drum techs.
Table of Contents
Meet the Drum Doctor
Before You Start: Necessary Tools
Things to Keep in Mind
Drum Tuning Basics
Getting Your Drums Ready for Tuning
Clearing Your Heads
How to Tune a Snare Drum
How to Tune Toms
How to Tune a Kick Drum
Heads, Mutes, Playing Styles and More
Meet the Drum Doctor
In putting this article together, we wanted to go deep, so we talked with an old friend of Guitar Center, Ross Garfield, aka the Drum Doctor. Not long after he moved to Los Angeles from Northern California in the early 1980s, Garfield became the go-to resource for drummers on L.A.'s busy studio scene and for top-tier touring drummers. While working at a local music store, he had fixed a snare drum for drum legend Vinnie Colaiuta. As Garfield always did, he put on new heads and tuned it up. Colaiuta picked it up on the way to a session with Michael McDonald. As Garfield told us, "I get a phone call about an hour and a half later from Vinnie, saying, 'Hey, man. I don't know what you did to this snare drum, but they loved it when I set it up, and now I've knocked it out of tune, and I can't get it back to where you had it. Can you come down to the studio and tune it back up?' And I said, 'Sure.' He goes, 'What would that cost?' I said, '50 bucks.' Colaiuta says, 'I'll give you 100 if you can be here within an hour.' So, I raced down there, tuned the snare drum back up for him, and got him going. And that was when it all clicked in my head that I could do this in a professional situation."
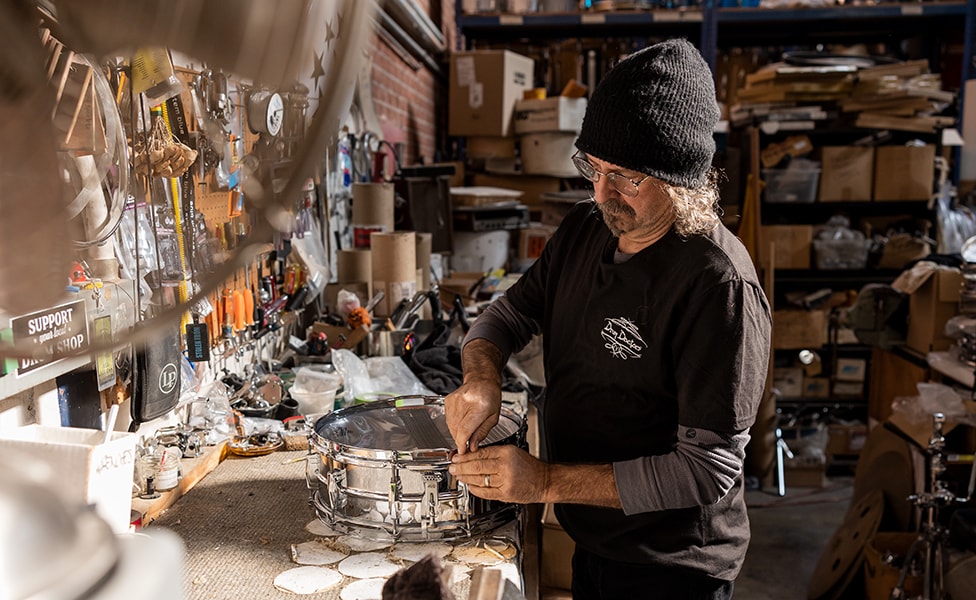
Starting there, over the past several decades Garfield has gained a devoted clientele who won't go in the studio or on the road without his help. Drummers from Jim Keltner to Abe Laboriel, Jr., artists from Sinatra to Slipknot, have relied on him to true, tweak and fine-tune their kits, and does the same for superstars and aspiring artists, all around the world. The Drum Doctor first came to us highly recommended by Tony Royster Jr., whose headlining performance at our Drum-Off Grand Finals show was set up by Garfield. Since then, Ross has been our number one go-to for making sure drums are set up and sounding exactly to the artist's liking for innumerable productions.
Before You Start: Necessary Tools
You'll want to have all of these things close at hand before your begin tuning your drums.
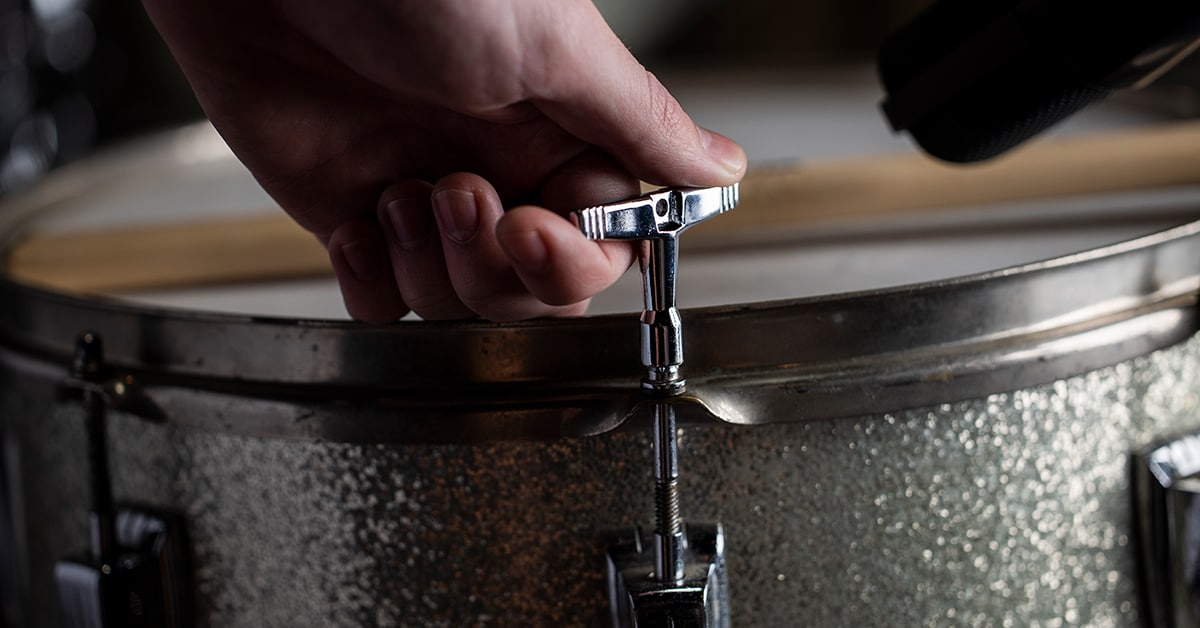
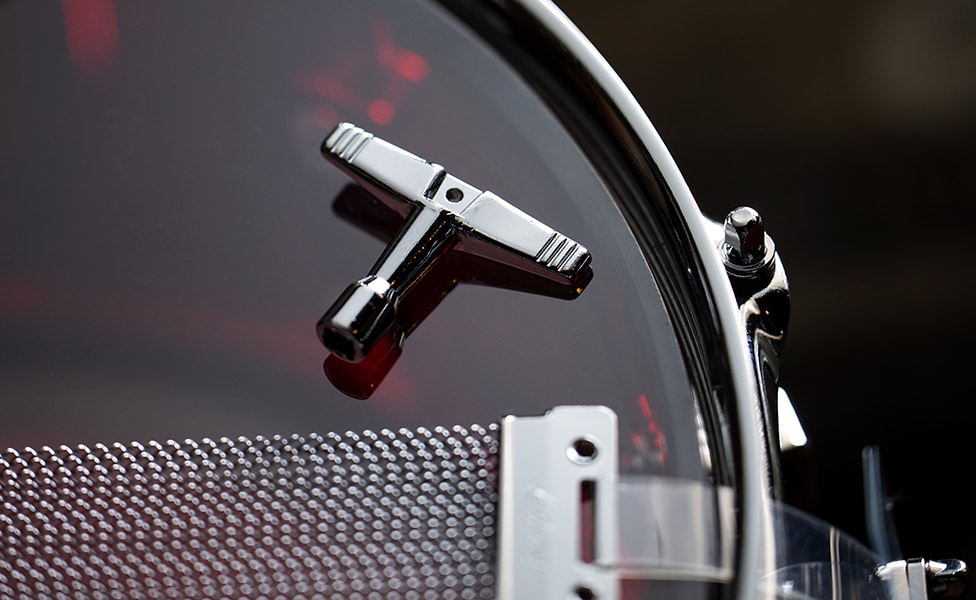
A pair of quality tuning keys: Nothing fancy necessary here, but some drummers prefer the keys with a grip knob at the top of the key, like the Remo Quicktech drum key, for greater ease of getting tension rods finger-tight. The Drum Doctor says, "I have a lot of different drum keys that I use. At any given time, I have at least two or three keys in my pocket and more keys in my backpack that I bring in," so you might want a collection like this DW DWSM808 Drum Key Multi-Pack. Tools like the DrumDial or Tune-bot can help by speeding things up when you're just starting to get into tuning your kit. But, in the end it's your ear and how the drum sounds to you that's going to be most important, so, no matter what tool you're using, don't just "tune with your eyes."
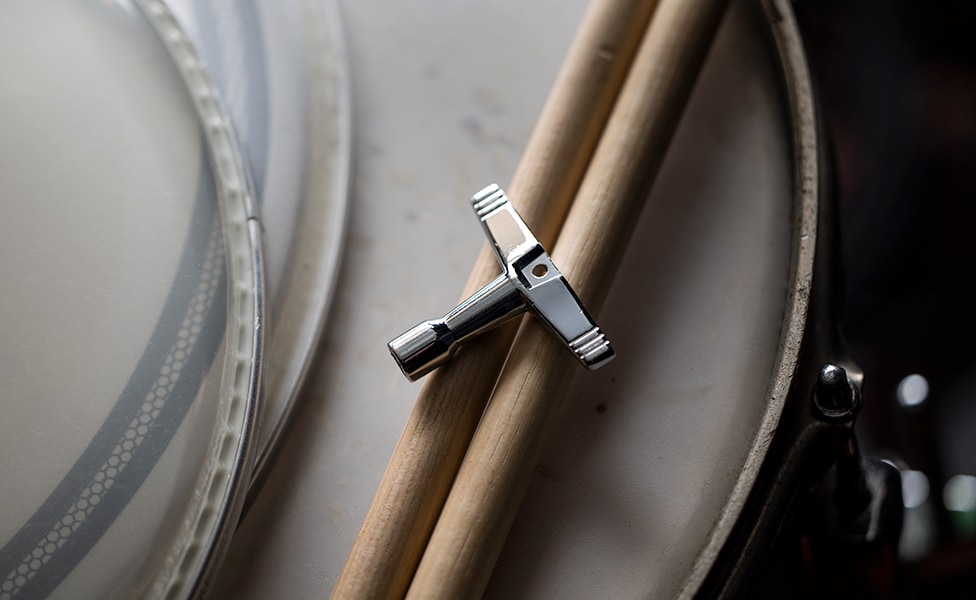
Sticks: Both your regular weight and a felt-tipped mallet, like a Vic Firth timpani mallet. Using a mallet instead of your regular sticks when you're clearing your heads (more about that coming) can make the pitch of the head a little easier to hear.
New drum heads (optional, maybe): If your existing heads have already been played for a while or you've been changing tunings a lot, you really should be starting with new heads here, as the old ones are probably getting stretched out. Perhaps you want to subtly re-voice the drum, and changing to a different style of head can be the key. Ross Garfield says, "What I call the basic starting point for most drums is coated Ambassador over a clear Ambassador. That is the most classic drum sound out there. You've heard it so many times in so many records. So that's a good place to start."
Things to Keep in Mind
When you first start learning to tune your drums, you'll want to set up where you can be comfortable, not hunched over a drum on the floor. We recommend a raised work surface where you can easily reach the tension rods without having to bend or twist. If you don't have a proper workbench, we know some drummers who keep a small folding camping table in their practice room for this purpose. It's a good height to be able to work on the drums and stashes away easily when you don't need it. John Good from DW Drums highly recommends using a turntable to spin the drum for easier access to the tension rods, like the DW Tuning Table, to keep from having to stretch across the drum constantly. This helps make sure that "finger-tight" is consistent on each rod when you're seating a head.
Pictured: DW Drums John Good Tuning Table
You'll also want it to be fairly free of background noise, especially when you're starting out. A big part of tuning your drums is learning to use your ear to hear minor differences in pitch when you tap the head at the tension rod points. So, don't crank up the tunes and headbang while you're tuning that kit.
Lastly, be relaxed and comfortable and take all the time you need. Don't think of tuning as a chore and rush through it. Consider it as part of your journey as a musician. You want to make the best music you can, and that requires that your instrument be ready to do what you need when you need it to.
Drum Tuning Basics
One thing to always consider when it comes to tuning drums is there is no "one, true way." If there was, everybody's drums would sound pretty much the same. As it is, there are many different paths to getting your kit sounding the way you want, and every method that gets you to where you want to be is equally valid. Some are art and instinct. Some are science. Some blend all those factors together. In the end, it's about developing and training your ear to recognize the good, the bad and the nasty. One of the best tips we've ever seen for any musician is to learn to play a second instrument. This tip especially makes sense for drummers, because picking up a tonal/pitched instrument, like a guitar or keyboard, helps you improve your ear for pitch and tonality. And that improved ear will be a big help in tuning your drums. You might even consider taking a basic music theory and ear training course at your local community college to hone those skills even further.
Enough with the theoretical stuff already—let's get hands-on.
Getting Your Drums Ready for Tuning
There are parts of the tuning process that will apply to every drum in the kit, and that's what we'll cover here. The first part of the process is to remove the old batter and resonant heads. You'll also want to remove the legs from your floor toms for the tuning process. While you've got the heads and hoops off, give the drum's bearing edge a quick check to make sure they feel equally sharp all the way around. You can just lightly run your finger around the edge to check. You can use a clean microfiber cloth to drag along the edges to check for rough spots (the cloth will snag on one if it's there). We suggest treating those edges with something like DrumDial Bearing-Edge conditioner, every few head changes to keep the head moving smoothly over the bearing edge when tuning. Some drummers will use a very light coating of beeswax, or a beeswax/carnauba blend furniture wax, every once in a while. You might also want to check the evenness of the bearing edge by placing the drum on a flat, smooth surface, like a polished granite counter or a plate glass tabletop, putting a light inside and looking around the bottom edge of the drum to see if there's any light leaking out. If you do see light escaping, it can mean a couple of different things. First, it can be that the drum shell has twisted a little from natural torsion forces. Putting heads back on and tightening them up will help deal with that. Secondly, it may mean that the drum's bearing edge needs to be touched up. That's probably not a job you want to do for yourself, so you should bring it in to Guitar Center Repairs, and we can evaluate it, then fix it or point you to a local drum tech who can. If everything checks out, it's time to get some heads on that thing, tune it up and get back to playing. Remember that your workspace should be comfortable, relatively quiet and set up so you can get to all the lugs on the drum without having to turn into a contortionist.
- Starting with the reso head, place a new head on the drum, checking to be sure it's as centered over the bearing edge as you can tell from a quick visual check.
- Place the counterhoop over the head, aligning the holes for the tension rods over the tuning lugs.
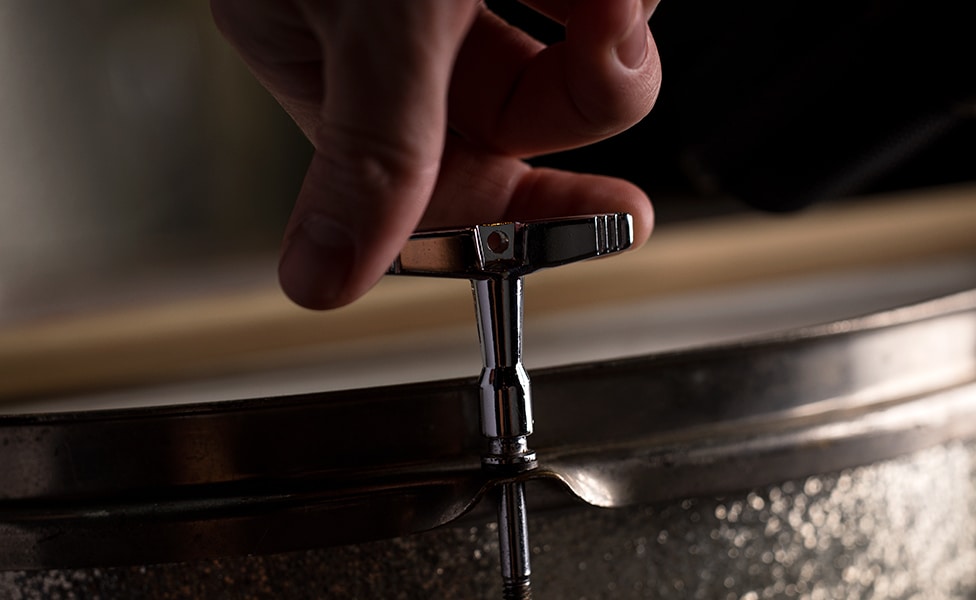
- Apply a little (just a couple of drops) lubricant, like LP's Lug Lube, to each tension rod. Insert the tension rods in the hoop, just touching the tops of the tuning lugs. To avoid cross threading, make sure the rods are absolutely vertical and start by spinning them backwards (counterclockwise) so that the threads drop naturally into place before starting to thread them into the lugs. Get each tension rod started, but don't begin to tighten them yet.
- Using either your thumb and forefinger on the threaded section, or on a pair of drum keys with a knurled or rubber coated thumb grip at the top, evenly tighten the tension rods directly across from each other until the heads of the tension rods are just touching the hoop. Repeat this going around the drum. There's no need at this point to use any sort of "star" or alternating pattern. Using this "two-at-a-time" method makes it easier to keep everything even, and we'll be sticking with it through most of this process.
- Using the same thumb-and-forefinger, two-lug-at-a-time technique, get the tension all the way around the drum "finger-tight" (as tight as you can get them without grabbing the drum key's wings or using more than just your thumb and forefinger). At this point, we're ready to start applying some actual tension to the drum head, but we're not tuning yet. We're going to get the head properly seated, so it will tune evenly.
- Next, we move from the thumb grip on the drum keys to the wings. We'll keep using the two-at-a-time method to get tension on the head. Set the drum with the manufacturer's logo facing you, so you always know you're starting from the same pair of lugs. Start by going around the head and tightening the tension rods directly across from each other until you start to feel a slight resistance. Traditionally, at this point, you switch to a star pattern for tightening when using a single key. For the double-key method we're using, just move both keys two lugs clockwise and tighten that pair to the same point as the first pair. Work your way around the drum until you've tightened all the tension rods to that same point of slight resistance. If you start to hear some cracking, don't be worried—it's just the film of the drum head stretching and excess glue where the film is attached to the hoop separating.
- Flip the drum over, and get the batter head to the same point. This is where some drummers will apply pressure (not too much) in the center of the head to ensure it's fully seated and go around the drum again to make sure the tension rods are still equally tight. Other drummers like to do this by applying pressure on the counter hoop directly above opposite lugs, in a similar pattern to the dual-key tightening.
From here, Garfield says, "I'll use the star method to get the tension even around the head, and then I'll take it down really tight. I'll tune that head really tight but it's really important that you start off with it being on there symmetrically—it's got to be even, top and bottom. At that point is I tune both the heads really tight. Like the tom will sound like a timbale." What we're doing here is getting the head stretched out a little and properly seated, prior to the actual tuning process, similar to the way that guitarists stretch out strings when they first put a fresh set on their guitar. The tension should be quite even at each lug but we won't need to make sure it's equal just yet.
Once we've done all this, we can finally start getting that drum tuned.
Clearing Your Heads
Also referred to as "equalizing," clearing your heads means matching tension and pitch at each tuning lug. Getting tension/pitch matched around the drum kills the "warble" you can get when overtones from unmatched pitches interfere with each other, killing sustain and making the drum sound sour. The process is the same for all heads, regardless of drum or whether it's the batter or the resonant head. The only variation is that, when clearing the bottom snare head, you use one hand to lift the snares off the head, so you can get a clear tone from each lug. Developing your ear to be able to quickly and accurately clear your heads is probably the most valuable skill in drum tuning. Here's the basic drill:
Grab a stick or that felt mallet we mentioned in the Necessary Tools section. As with seating the heads, start with the drum logo (or the snare throw-off) facing toward you, so you always have the same starting point. Starting at whatever lug is nearest to you, gently tap the drum head about an inch in from the counterhoop directly in from the head of the tension rod. Listen to the pitch. We'll use this pitch as the starting comparison point. Rotate the drum so the next lug is directly in front of you. Tap again. Is it lower or higher than the first one or the same pitch? Tap at the first lug again and compare if you're not sure. Make a note as to what the pitch relation is, but don't change anything yet. Work your way around the drum, comparing back to the initial lug you used as necessary, making notes along the way. You should be finding that lugs opposite each other should generally be about the same and by the time you've worked your way all around the drum, you'll have a map of what lugs are high, what lugs are lower, and what lugs are about the same pitch as your first, reference lug.
Next, using your notes, go to any lugs that were lower in pitch than the first lug, and tighten them, one at a time, tapping with the mallet (or stick, whichever you're using), and comparing back to the reference lug until they match. You probably won't need any more than an eighth of a turn of the drum key if we've done everything else right up to this point. Bear in mind that changing one tension rod will subtly change the tension on every other one. This happens mostly on the one directly across from the tension you've changed, and proportionally slightly less for each lug between the opposite lug and the one you've changed. There's subtle physics at work here, but you don't need all those details (though, if you find that type of stuff interesting, go for it). Once again, work your way around the drum, first hitting the points that were lower in pitch, then the ones that were higher. On the ones where you're dropping the pitch, it's good to go slightly under/lower, then tighten back up to the desired pitch. Once all your pitches match, you've cleared that head and can move on to the next one.
How to Tune a Snare Drum
As the Drum Doctor says, "The snare drum is the voice of a song," so let's go there first. When we were talking about snares, Garfield chose what we think is a fine example. "Say, it's a Rolling Stones song—Charlie Watts would always have his snare drum with a little bit of ring to it, and it always sounded kind of raw. Opposed to, say, Jeff Porcaro, whose snare drum would always be more refined, with a little more dampening on it. It was tuned so it was cleaner, if that's not too vague of a description. But, for me, I'll think about what will make the drums sound like the essence of the song. It's really important that, every time the drummer hits it, I want it to have that feeling. I want that sound to bring out that emotion, and that's what I'm trying to do with the drum set."
Garfield's preference (and that of many drummers) is to keep the resonant head of the snare tuned high—as much as an octave or more higher than the batter head. He says, "I think a lot of drummers are afraid to tune the bottom head on their snare tight enough because it's such a thin membrane. I think they're afraid they're gonna break it. As long as you keep that tension even, that bottom head should last a long time. You shouldn’t have to worry about that." A tight reso head adds sensitivity to the snare wires, enabling a wider dynamic range. Since, in the last step, we cranked up both heads, the reso head is probably about where we want it, needing only to be cleared, as we discussed in the last section. One more note about the snare-side head, though. Garfield notes, "Another thing some people don’t realize is that you have to have your snares centered on that head. If one side [of the snare wire] is up against the edge and the other side is an inch or two away from the edge, you're not gonna get a very good sound out of your snare drum." So, make sure that your snare wires are properly centered before we go on to the top head. You'll also want to ensure that your snare strainer is not adjusted so tightly that it starts to choke the sound of the drum. In general, the wires should be tight enough that they'll activate with a light tap on the snare head, but don't kill sustain or resonance.
In the way that the reso head controls sensitivity, the snare batter head is going to be what sets the personality of the drum. Since we cranked it up when seating the head, you'll want to reduce the tension to where you want the voice of the drum to be. Before you start, clear the head at that higher pitch, since that will save time in getting the final tuning dialed in, if you follow the Drum Doctor's instructions. Garfield says, "I'll loosen it down to the pitch that I like. Starting with the top. I'll loosen the top a little bit. Maybe I'll take it down two full turns on every tension rod and listen to it. And then, you'll get to a point where you'll hear it." This may sound a little mystical to start with, but, with some practice, you'll start to hear where the natural voice of a particular drum is—sort of where it wants to be tuned. Every drum will have a range of pitches from low to high, where it's most comfortable. The lowest you can tune will be the lowest point where you get a clear tone without it being "flabby." The highest will be just short of where the drum starts to choke and lose sustain.
For the snare, anywhere you want it to live in that range is up to you, whether you go low for a big, fat, more classic rock sound, high and tight for jazz or soul, or a medium range, which can be general purpose, but is great for drum 'n' bass tracks. The key is spending the effort to clear the head at whatever pitch you decide on, for a drum that will ring true.
How to Tune Toms
The biggest controversy in tuning toms is how the batter and resonant heads should be tuned in relation to each other. One school says that they should be tuned to the same pitch, which adds resonance and sustain to the drum. Another school says the reso head should be tuned higher than the batter head, which adds a little downward pitch bend to the drum when hit hard, and decreases sustain slightly, so you need less muffling. A third school says the reso head should be lower than the batter, which gives a more pronounced pitch bend, a slightly "tubbier" sound, and, as with pitched higher, less sustain, as the heads don't reinforce each other's vibrations as much. There are various sub-schools within these divisions (e.g. "the bottom head should always be tuned a minor third higher than the top head"), but we're looking at a general overview here.
We subscribe to a fourth school—the school of "do what sounds best to you." Seriously, all these approaches are valid ones, and you don't even have to stick with one of them across your entire kit. For example, matching pitches between top and bottom heads works really well for larger toms, making them sound even bigger. You can choose which drums you want a subtle pitch bend on, or a more extreme one. It's about what you want it to sound like and learning how to get there. As Garfield says, "Usually, I have the bottom head looser than the top, and that gives you that nice bend, and nice, long note. I say ‘usually’ because when you're in the studio, that's a starting point. And then I'll refine it to the song. I'm always listening to the song and massaging it to a place where I think it's right for the song."
Since we've covered the basics of seating and clearing heads already, let's assume that we don't have to go over that again and just talk about what variations we have for tuning your toms. Your heads are probably still cranked from seating them (at least if you've been following along at home), so it's time to decide where you want your toms to be voiced. To begin with, now that the heads are well seated, take both the batter and reso head back to finger-tight.
The interactions of the batter head and the resonant head are complex. The truism that the top head determines pitch and the bottom head determines resonance (as you might expect from its designation as the "resonant head"), is very much a simplification. A two-headed drum is a single system, and neither head acts in isolation. It's the interaction of the heads as the resonant head bounces sound back to the batter head that makes the drum's voice. If you want to perform an experiment, with the resonant head just finger-tight, tune and clear the batter head at a pitch that sounds good to you for that drum. Then, tighten and clear the reso head an eighth to a quarter turn at a time and play the drum until you reach the point where the sound of the drum starts to choke. The difference in pitch from the drum will span most of the entire usable pitch range of the drum, all without having changed the tuning of the batter head at all. From this we can see that it's the interplay of the two heads that creates that final sound.
You should have noticed, as you did this experiment, that there are places where the drum sounded and felt better, and that's the key to what we're going to do here. After all, the purpose of all of this is to get your drums sounding the way you want, right?
So, let's look at the simplest possible way to get there to begin with. At this point, we should have the heads seated, and you've learned how to clear the head. So, starting with your largest tom, let's take each head back to finger-tight, then, using a star pattern or the double-key method outlined earlier (your choice), tighten the resonant head lugs a quarter to a half turn, so that the head produces a clean tone. Clear the head and flip back to the batter head side. Note: From this point on, we want to have the drum you're tuning either mounted on its legs, on the kit or on a stand, so that both heads can vibrate freely.
Using your choice of star pattern or double-key, tighten and clear the batter head to whatever produces the lowest clear tone for that drum. Strike the drum. Does it sound good? Is the pitch where you want that drum to be? Is the rebound and feel what you want? If the answer to all of those is yes, then you're done with that drum for the moment. If you're not satisfied with the sound, the pitch or the feel, tighten the lugs another eighth turn (from this point on, an eighth turn at a time will be the largest tightening amount we'll do for pitch change), clear the head and hit the drum again. If it's sounding good to you, leave it be for the moment. Now, let's switch to your smallest tom.
Why switch from the lowest to the highest? What we're doing is defining the outside edges of where your toms will be tuned. For this tuning method, we're not concerning ourselves with specific pitches, but we do want to create cleanly defined intervals between the drums, and by finding the high and low limits of the toms on your set first, we can place any drums in between those two at musically appropriate spaces. So, follow the directions given above to bring your highest tom to a pitch and feel that sounds good to you. We're still not adjusting the resonant heads yet.
Hit the two toms you've tuned one after the other. Does the musical interval sound good? Hit them together? Do they sound good together? If they don't, adjust and clear the batter head again, until they sound good when hit together. If you really like what you're hearing, you can use a chromatic tuner app (there are a number of free ones out there for both iOS and Android devices) on your mobile phone to note what the pitch of the top and bottom drums are, so you can find that same interval again. If you follow the general guidance of toms being spaced an interval of a fourth apart (think the first two notes of "Here Comes the Bride"), a four-piece kit (we're following the standard of not counting the snare here) will have two rack toms and a floor tom, and the interval from the floor tom to the smallest rack tom will be roughly a flat seventh (e.g. C to the Bb above), or the first two notes of the original theme from Star Trek. For a five-piece kit, lowest to highest will be an octave plus a minor third.
Once the outside toms are sounding good together, use the same method to tune any toms between the lowest and highest. Always check that any combination of two toms sounds pleasant both when hit consecutively and simultaneously. Play around the toms. Do they sound like they're all part of the same kit? If they do, you're pretty much done (lucky you). If one or two sound like the pitch is right, but the resonance or sustain is different from the others enough to sound "off," it's time to do a little resonant head tweaking.
Although, as we've seen, changing resonant head tuning can raise and lower the pitch of the drum as much as changing the batter head tension, the biggest contribution of the resonant head is its effect on the voice of the drum's overtones. Even though the drum will sound with the same fundamental tone, changing the tuning of the reso head will reinforce or cancel out some of the overtones from the batter head. Using this behavior to change the emphasis of the overtones essentially "remixes" the drum's sound. For example, a lower reso head tuning will make a drum sound deeper and project better, even with a fairly high-tuned batter head. A higher reso head tuning will help a drum "speak" more quickly, but won't project quite as well. Since drum heads of different thickness and weight will have different pitches and overtones at identical tensions, this is where learning to use your ear is the most important skill you can develop in tuning drums.
We're going to stress again that there is no magic formula or one true way here. We wish there were, but, as Garfield says, "The bottom line is it's got to be symmetrical. You have to have a good ratio between the top and the bottom, and you have to have very similar tension on each of the lugs on each head. So, that's a good place to start. A lot of people don't realize that you can get it close and then put a little muffling on there, and sometimes, a little bit of muffling will take it the last 20%. So, you can get it sounding good just by getting the drums sounding close, and then putting muffling on it. And then, the other part of it is if you really concentrate on getting your tension rods equally tight, you can make the drums sound really good without any muffle."
So, if you're liking the pitch and playability of the toms with the batter heads where they are now, but something about the overall tone is bothering you, start by tightening the lugs on the reso head by an eighth of a turn and clearing the head. Listen to the drum. Is it ringing truer and more musically? If not, try another small increase, maybe a sixteenth of a turn, and check again. If it's sounding good, move to the next drum, and so on. Once they're all done, recheck the intervals from drum to drum, as tightening the reso heads will have raised the overall pitch of each drum. Readjust as necessary and play some fills to make sure everything is still sounding musical. If you're happy, let's move on to the kick drum.
How to Tune a Kick Drum
When tuning your kick drum, there's one big decision to make—are you going for a "thud" or "boom” sound? Although the classic rock and pop kick drum tends to be more on the loose and low-pitched end, a number of drummers for that style like to get a little more of a defined tone from their kick drum. Jazz players, of course, tend to go for a higher kick drum tuning (and higher tuning overall) that can make the kick part of a more melodic playing style. The basic approach to both is quite similar. Note: If you plan on using some internal muffling in the kick drum (please don't dump a whole laundry bag in there; a small pillow that's long enough to just touch both batter and reso heads is enough, we swear), you'll want to tune the batter head before putting it in and putting on the reso head.
Assuming that you've seated your kick drum batter head, bring it back to finger-tight, then use the star pattern or double-key method to bring it to its lowest clear tone. This should be just past the point where all the wrinkles are out of the head. Clear the head. That really should be it for the batter, unless you're looking for an exceptionally high-tuned kick, in which case, get it to the pitch you want, one small step at a time, and clear the head after each change.

From here, we'll use the resonant head to bring the pitch up and fine-tune the tone of the drum. So, if you're sticking some muffling in there, now's the time to do it and put the resonant head back on (if you hadn't already seated the reso head, now's the time to do that, and then bring it back to finger-tight plus a quarter turn. Clear the head. That may be all you need. If you want a little more of a tonal quality (boom) to the kick, tighten another eighth turn, clear the head and play the drum. If it sounds good at that point, check the sound of the whole kit. If it's not quite where you want, it will only take small changes in the resonant head to be able to shift the kick to wherever you want.
At this point, spend a little time playing around the kit. Does it sound musical? Is it satisfying to play? Maybe have another drummer come by and play it, so you can listen from a distance and see how it sounds from in front of the kit. Now that you've got the basic concepts, you can fine-tune things and experiment. The more you try stuff out and use your ear, the better and faster you'll get at making your drums sing.
Heads, Mutes, Playing Styles and More
Finally, a few words about drum heads, mutes and muffling, and how your playing style might affect your tuning.
The heads you choose are probably the biggest factor in the sound of your drums. Yes, the materials and construction of the shells themselves contribute to the overall timbre of the kit, but less than you might think. But, changing from double-ply clear to heavy single-ply coated heads on the batter, or moving from single-ply to double-ply on the resonant side, will make a far bigger difference in tone, sustain and decay than switching from birch to maple shells. There are some classic combinations, like the coated Remo Ambassador batter, clear Ambassador reso that the Drum Doctor recommended above, but, as he also says, "That's a good place to start, but I have been trying to get more precise by using different head combinations. And when I say ‘precise,’ I mean to nail the sound that they're looking for better. To do that, sometimes, I'll use a clear Emperor on the top with a clear Ambassador on the bottom. That's a little punchier sound, especially on the toms—and it's a real crowd-pleaser." So, you may want to experiment with different head combinations to find your sound. To save some time and money, our suggestion is to experiment with a single drum, say a small tom, and pick up two or three of the head combinations you'd like to try, swap them in, tune them up and listen. When you find something you like, think about changing the rest of the toms, or even the whole kit.
To get you started, here are some basic guidelines. Clear heads have slightly less attack, but more punch and ring. Coated heads have a sharper attack (because the coating is actually harder than the head film) but a warmer sound and less ring. Heavier heads, either thicker or multi-ply, will have more fundamental and less pronounced overtones. If you want even fewer overtones, choose tom heads with built in muffling rings, like Evans EC2, or you can start adding some muffling/muting.
When it comes to muffling your drums, many drummers prefer cloth or cotton of some sort, although sometimes you make do with what you have at hand. Garfield tells a story about a live session with Jim Keltner for producer Jon Brion. "Jim's snare was ringing a little bit too much for Jon. And Jon looked at me and goes, 'Can you find something to dampen down that snare?' And the first thing I saw—there was a craft table with lunch on it, and I was gonna get a napkin to put on there, but I said, 'You know what, I could dampen that drum with this piece of bread.' So, I took a piece of sourdough bread, and I taped it to Jim's drum, and it sounded great. You can dampen a drum with a lot of different things."
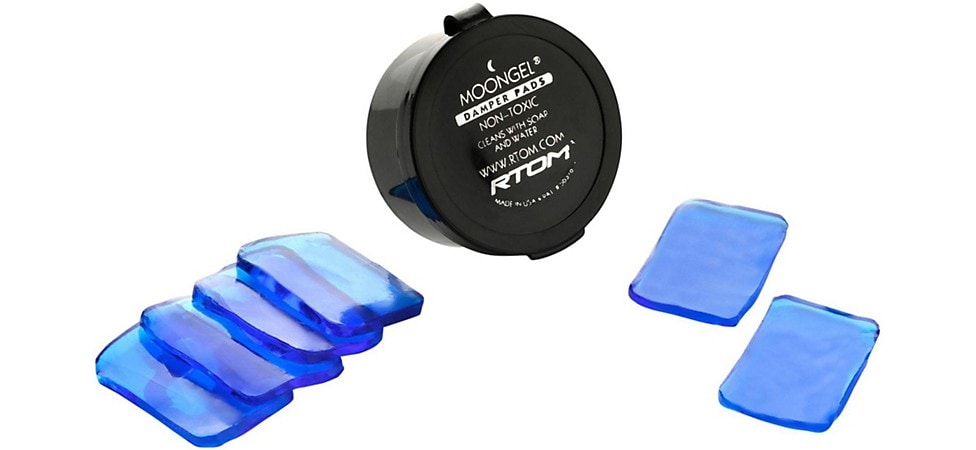
Pictured: RTOM Moongel Percussion Dampening Gels 6-Pack
The key to muffling a drum without losing its tonality is to make the muffling as symmetrical as possible. This is so you don't interfere as much with the natural vibrational pattern of the drum head. So, a muffling ring that sits around the edge (which is where the overtones are most prominent) will give you a purer fundamental, if you're not already using heads like the EC2 mentioned above. Keeping a box of Moongels around is the simplest way to go here, especially if you generally like a more open sound, but need some extra control for a specific venue or session. On the other hand, the Drum Doctor says, "I've always done it with gaffers tape and either tissue or paper towel, or a piece of fabric … I find that those are better tools for me. My whole thing is about making everything unique and specific to that song or that project. So, I like to use different materials. I'm not gonna be using what everybody else uses."
Your playing style is going to have a big effect on both your tuning and your choice of heads. In talking with Garfield, we asked him about the difference between tuning and setting up kits for Joey Waronker, who has an extremely light touch, and Chad Smith who, as anybody who's ever seen him play can attest, is pretty merciless. Garfield says, "Joey is the king of the light touch. So, we can use much thinner heads with Joey, and he doesn’t break things. He doesn’t knock things out of tune very much. Chad, he's a much bigger guy, got longer arms, and he really slams the drums. So, we'll use thicker heads for Chad, or we'll have to change them more often. I have a session going with Joey right now for Beck, and we delivered eight sets of drums for Joey—these are all his drums that we keep here—and each one is set up differently. Some of them are set up with what I call a jazz tuning, which is no muffling whatsoever on the toms. It's just tuned high and with a fair amount of ring. Other sets are tuned very dead where we have pieces of fabric taped to the heads to muffle them down so there's virtually no ring. What I do with Chad when I work with him is a little muffling on every drum, just because he's hitting them so hard."
We'll close this with a tip from the Drum Doctor for gigging drummers—and it's one we intend to pass along to every drummer we know. When we asked for tricks to keeping drums in tune on a gig, Garfield had this to say, "If they're really slamming the drums, they're probably gonna have to retune after every song. In that situation, the first thing to do is to check the tension rods that are closest to you as you're playing the drums. So, when you're playing—most drummers are playing right-handed, so their left hand is coming down on that snare drum. It's usually the tension rod, or the two that are the closest to where that stick's coming down on the drum, that get knocked loose first. The same thing with the toms—it's usually the tension rods that are closest to you that are getting knocked loose. So, if you just played a song and your drums are a little out of tune, it's usually those few tensioners. You don't have to go around the whole drum to re-tune it. You just feel for looseness in those tension rods that are closest to you on every drum."
Now that you know, put all of this in use. Like with everything else in life, reading about and doing it makes all the difference. Put aside an afternoon or two, sit down with your kit and practice tuning. Practice revoicing the drums. Practice getting balanced tone across the kit tuned high, tuned low and in between. Whatever additional tools, like a DrumDial or Tune-bot, that you decide to use to help along the way, let your ears be the final judge. Learning to listen more closely combined with intentionality in action always makes better music.