


Noise—we live in a world full of it, and it can make your musical life miserable. In this article, we're going to look into the roots of the noise that drives you crazy in the studio and onstage, and offer up some tips and techniques to track down the sources and reduce or eliminate them. So, the next time you get what you think is the perfect take from your guitarist, but playback reveals a nasty hum that's underlying the entire track, you'll know what to do. And, you'll learn to avoid being in the middle of a hot live show when your bass player's rig suddenly starts blasting out the annoying sound of a cell phone trying desperately to connect with a tower.
Types of Noise
Strictly speaking, pretty much all that buzzing, chirping and clicking that finds its way into your audio falls under the general category of EMI (Electro-Magnetic Interference). This is generally broken down into the sub-categories of 60Hz hum, RFI (Radio-Frequency Interference, which is just EMI where the source lies within the radio frequency range) with everything that doesn't fall into those two buckets considered just general EMI. It's all annoying and sometimes difficult to track down.
60Hz hum isn't always at 60Hz, but can occur at varying harmonics of that frequency. Which is a good thing, because it can help you determine the source and cause of the problem. If the hum is actually at 60Hz, it's likely due to faulty cables, poor shielding or an audio cable being close to a strong magnetic field, like a transformer-based power supply. If the hum is an octave higher, at 120Hz, or at one of the higher harmonics of 60Hz, it's almost always some sort of ground loop problem.
Where You'll Find Noise
If you are looking to pinpoint the sources of that nasty noise, the difficult thing is that, in the modern world, it's almost everywhere. The contemporary computer-based studio comprises a giant pile of EMI sources—computers, digital devices, power supplies, even the DSP in your audio interface—all of which can be kicking out noise in the radio-frequency and general EMI ranges. When you go live, add in all those cellphones and wireless devices that are present, and you realize you're living in a world that's constantly bombarded by sources of electrical noise.
So, what are the biggest (and most likely) offenders? Multiple ground paths, external power supplies, badly shielded electronics and old or poorly constructed cables are probably the first things to check for. Unfortunately, it's usually a combination of these, not just one factor, that gets the noise into your system, so there's rarely any sort of "magic bullet" solution that will miraculously remove all that racket from the audio path. Most times, a hybrid approach is necessary to squash all the hum, buzz and random insect-like chittering sounds, so let's take a look at options to get you on the path to blessed silence.
Tips for Squashing Noise
While this isn't an exhaustively complete list, here are a series of tips for dealing with the most common noise problems. We've got product recommendations where appropriate, and we're trying to stay away from Band-Aid solutions that cover up, but don't really solve basic issues that lead to the proliferation of noise in your system.
Proper Power Conditioning
One of the keys to reducing noise is making sure your power is clean and as noise-free as possible before you plug anything in. There are a couple of different levels of protection available here.
Modern music gear, especially gear with digital components, is especially sensitive to voltage surges, as can happen during lightning storms, or even when a large motor, like a refrigerator or air conditioning compressor that's on the same circuit, turns on. The most basic protection in these cases are surge-protecting outlet strips like the LiveWire Power Strip and Surge Protector or the D'Addario Tour Grade Power Base. Both of these units are primarily surge protection but provide some EMI/RFI filtering. Be aware that the MOV (Metal-Oxide Varistor) surge suppression in these types of surge protector isn't designed to last forever. It's like the bumper on your car that can help protect you for a few mild collisions or one larger one, but needs replacing after it gets hit one too many times. MOVs becomes weaker with each surge they have to cover, eventually losing their ability to protect against them. Your best bet is to replace these relatively inexpensive units on a regular basis—once a year or so—to avoid discovering the hard way that the internal MOV has failed.

Pictured: D'Addario Tour Grade Power Base
The second level of protection here is a power conditioner. These units, available in outlet strips and rackmount units, offer surge protection and substantially upgraded noise filtering. The base level power conditioners, like the LiveWire 9-Outlet rack unit and Furman PST-2+6 remain MOV suppressors, so require regular maintenance or replacement, where more advanced units like the Furman PL-Plus C rack unit and PST-8D power strip upgrade to a hybrid, maintenance-free surge suppression system and more extensive filtering.

Pictured: Furman PST-8D Power Station Series AC Power Conditioner
The highest level of power conditioning you can get adds on voltage regulation. These premium units not only protect against surges and line noise, but they make sure that your gear gets a steady 120VAC, or, if the voltage variation is too great for its internals to compensate, shuts down safely so your equipment doesn't get damaged. Furman's Prestige series has units that handle up to 30 amps, starting with the P-1800 AR. These are serious pro touring units, but if you've got custom or vintage gear to protect and keep sounding as good as possible, they're definitely worth the bucks.

Pictured: Furman P-1800 AR Voltage Regulator / Power Conditioner
But what about a smaller scale, like your pedals or pedalboard? We're glad you asked, because that's what we're looking at next.
Quality Power Supplies
Whether you've got one or two pedals, digital instruments or rack units that use external power supplies, getting them clean, filtered power that's free of noise is equally important as making sure your main AC power source is clean. In fact, making sure your smaller power supplies are clean and quiet may be even more important, since any noise that creeps in before you hit an amplification stage is only going to be, well, amplified.
While it's entirely possible to find inexpensive wall-wart power supplies online, we really recommend against it if you're trying to keep things quiet. Poorly designed, cheap power supplies tend to inject more noise into your signal path. If you put your ear to that budget special and hear a whine or a hum, that mechanical noise may very well be finding its way into your gear via magnetic induction. If you want to get the skinny on your best choices here, check out our article, “How to Power Your Pedalboard” .
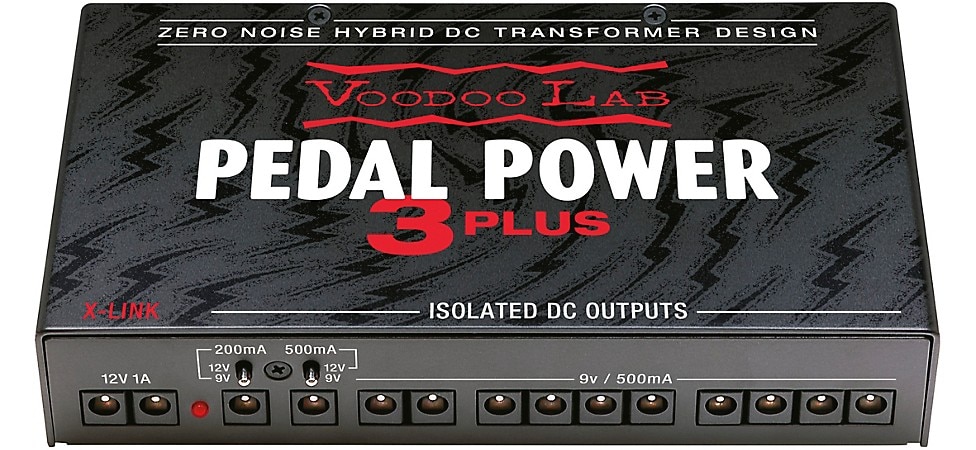
Pictured: Voodoo Lab Pedal Power 3 PLUS High Current
One key thing is to make sure that every pedal is getting the amount of current (aka amps) that it needs. This is especially true if you're mixing digital and analog pedals, as digital pedals have substantially higher current needs than analog. Too little current and your pedals can get noisy, act strangely or, worst case, simply not turn on at all. As long as the voltage and polarities are correct, though, having more current available than the pedal needs is never a problem. It's only going to draw as much as it requires, so having surplus is a great space to be in.
Larger Wiring Issues
A problem that's frequently overlooked is that—especially with older construction or spaces where D.I.Y. repairs have been done in the past—individual outlets may be wired incorrectly, groups of circuits may be wired inconsistently or proper grounding protocols weren't followed. Before you start taking everything apart to find a noise source, we highly recommend picking up a good outlet tester, like the American Recorder Technologies Ground Fault Outlet Receptacle Tester 110V, and using it to make sure that every outlet you're using tests out okay. Which brings us to one of the most common sources of noise, grounding issues.

Pictured: American Recorder Technologies Ground Fault Outlet Receptacle Tester
Staying Grounded
In theory, "ground" is a place of zero voltage potential reached through a path of zero resistance. If only theory and reality were the same thing, there'd never be a ground problem. Unfortunately, it's only in theory that theory and practice align. In the real world, every path to ground has a certain amount of resistance, and if multiple pieces of equipment (pedals, rack units, amps, etc.) are connected, whichever ground path has the least resistance is the one that's going to be used. This is complicated by the fact that earth ground, chassis ground and signal ground will differ from one piece of gear to the next. Making sure that everything is properly grounded is important for safety as much as keeping noise to a minimum.
Speaking of safety, using "cheater" plugs that go from three pins to two, lifting the ground connection in the process, can be an effective troubleshooting method to track down where you may need to make some changes to kill a source of noise. It should never be considered a solution, though, as removing a ground from a system can, in the worst case, make you the ground, and we'd like to keep you around for a while. As far as removing ground pins from equipment plugs? Just don't. It's not safe, and the only way to undo it is to cut off the mangled end and replace it with a new, properly grounded plug.
Ground Loops
A ground loop occurs when there is more than one available path to ground in a circuit. For example, if you're running a dual amp setup, each of which is plugged into a separate outlet with its own ground connection, and you're running from your pedalboard, which also has a ground, through cables that have their own ground, you can see that the signal has multiple ground paths available. Electricity is lazy, and it will always take the easiest path to ground. Remember that, as we mentioned above, a 120Hz or higher harmonic noise signal will generally point to a ground loop issue.
So, how do you track down a ground loop? Let's use a mixing board as an example. First, disconnect everything and listen to the board through its headphone out. Is the noise/hum still present? If it is, the noise is probably not a ground loop, and you should look into the power source for the board. If the noise is not present, start by plugging in the different inputs individually. If one connection shows noise, plug in a second to see if the noise spreads to the next channel or remains isolated to the channel that showed the noise. If the noise doesn't spread to the second channel, check the gear the input is connected to. Once you've checked individual channels, start checking them in groups. After you've cleared the inputs, plug in the outputs, one at a time, and see if the noise appears there. As you can see, this can be a lengthy troubleshooting process.

Pictured: Morley Hum Exterminator
Ground loops can be insidious problems and difficult to find. Solutions will vary, but the basic concept is to make sure there is a common ground path available. If it's just a single device that's the problem, a hum isolator like the Morley Hum Exterminator will probably do the trick. If it's a larger issue and the equipment is in racks, you can float the gear's chassis grounds by using a pair of nylon washers, one on either side of the mounting bolt with a steel washer on the outside to avoid tearing up the outside nylon washer, then use a single ground wire to tie the equipment chassis together. Sometimes, when your gear is separated and maybe even on different circuits, the best solution can be a transformative experience, as we'll see next.
Transforming More Than Power
While power transformers can be a source of noise, as we mentioned above, other transformers can handily solve noise problems. These are isolation transformers, and they can stop noise dead in its tracks.
So, what does an isolation transformer do? Basically, it uses capacitive coupling to pass AC signals (like audio) while blocking DC signals and common mode signals (a signal that is carried identically on both the positive and negative or hot and neutral conductors). Transformers used strictly for isolation will have a 1:1 winding ratio, theoretically not changing the audio signal in any way. Audio transformers for changing level and/or impedance, like direct boxes and level shifters, will also keep common mode noise and DC signals from passing. There are a wide variety of these devices that can be put to use in removing noise from your system.
Isolation Boxes, D.I.s, Line Drivers and More
If you don't need anything about the signal to change, other than the noise, a simple isolation transformer like the Morley MHE 2-Channel Hum Eliminator or Radial Engineering StageBug SB-6 Passive Stereo Line Isolator will do the job. These devices are designed for line level signals. If you have lower-level signals that need to travel longer distances without picking up noise along the way, converting it to a quality balanced signal is the way to go with the appropriate D.I. box for the application. Radial Engineering has a huge selection of D.I. boxes, including the Radial Engineering SGI TX/RX Studio Guitar Interface for guitarists to run a long, balanced line that converts back to proper impedance and level to plug into an amp. There are also line drivers and level shifters to make sure you get a noise-free signal to where you need, at the level you need. Cool tools, even if you don't have a noise issue to deal with.

Pictured: Radial Engineering SGI TX/RX Studio Guitar Interface
Dealing with Cable Issues
There's a reason why cables are one of the most common sources of noise in your system. If you think about it for a moment, what's a cable made of? Wire. And what's an antenna made of? Wire. It's all too easy for you cables to turn into receiving sources for noise. Here are some tips for reducing that possibility.
Cable Length
First of all, do the best you can to keep all your cables as short as you can. If you're playing on a stage that's 8x12', you really don't need that 20' guitar cable or 35' mic cable. If that's all you've got available to use, don't coil up the excess and place it next to an amp, a power supply or an outlet strip, as coiled wires are especially susceptible to having noise induced from the types of electro-magnetic fields generated by transformers. This tip applies in the studio as well as onstage, possibly more so. Custom cable lengths are your best friend when laying out audio paths in the studio.
Cable Type
Cables mainly come in two types—balanced (TRS, XLR) and unbalanced (TS, RCA/Phono). While we're not going to go into depth about what that means here (you'll have to read our cable buying guide for a deeper dive on that), there are some basic things to keep in mind.
Balanced connections (in the applications we're talking about here these will be connections made with XLR and TRS cables) are always quieter and can handle longer cable runs. So, it's a good idea to use balanced cables and balanced audio devices wherever possible. As we discussed in the section above about isolation devices, D.I. boxes and audio transformers, if you need to run a signal for a long distance, you want to convert it to a balanced signal as close to the source as you can. So, for regular guitar cables, RCA/phono cables and the like, getting them either balanced or boosted to line level (both if you can and it's appropriate for the application) fairly quickly is a good way to eliminate the noise that can come from long cable runs.
It's important to note that it's not the cable itself that makes a connection balanced or unbalanced, but how the circuit it's connecting to is designed. Plugging a TRS cable into a guitar pedal doesn't balance the circuit. In fact, if your pedal uses the input jack as a form of power switch, plugging a TRS cable in can keep the pedal from powering on.
Cable Routing
When we're talking about the type of induction that adds noise into your audio, nobody's getting into the Hall of Fame. Whenever you have a strong electrical current running next to a cable that's carrying a relatively weak signal, the magnetic field generated by that higher current can induce noise into that mic/instrument level signal. So, it's important to make sure that your cables are properly routed, especially when they're unbalanced like a regular guitar cable. Avoid having signal cables and power cables running parallel to each other. So, for example, don't bundle the IEC power cable that feeds your pedalboard power supply with the cable that's running back to your amp. If they do have to cross each other, make sure that they do so at as close to a 90° angle as you can get. When planning out your studio or rehearsal space, or when you're putting together your pedalboard, think ahead about how you can keep power and signal cables as far apart as possible.
Keeping Your Cables in Good Shape
Cables aren't forever. Over time, as cables are coiled and uncoiled, stepped on, run over or just flexed, the wires inside will fatigue and break, solder connections will age and crystallize and conductors will corrode. Each one of those factors can let noise start creeping in, and eventually you'll need to replace them, so it's a good idea to plan a schedule for rotating out cables. In the meantime, here are some things you can do to help keep your cables alive and quiet as long as possible.
The Proper Way to Coil or Wrap Your Cables
The first thing is to learn the right way to coil or wrap cables. The two keys are not stressing the cable as you wrap it and minimizing the amount of twisting the cable does at every step along the way. So, stop just wrapping cables around your elbow, and switch to the "over/under" method. Many recording schools and colleges with music technology programs make this simple cable wrapping method part of their first-year curriculum. We'll save you the tuition costs. Let's start with a standard XLR mic cable as an example:
- Begin with the male end (the end you would normally plug into the mic pre or mixer) in your left hand. [Note: If you're left-handed, you can swap hands if that's more comfortable or feels more natural. Just remember to also swap the direction of the different twists as well.]
- Grasp the cable between the thumb and forefinger about 18" below your left hand.
- Bring it up to make a loop while giving the cable a half twist clockwise, by rolling your thumb away from you, then grabbing the top of the loop in your left hand. That's the "over" part, where the new loop is in front.
- Slide your grip down about 18" again, this time making a counter-clockwise half-twist, rolling your thumb toward you when you create the loop. This makes the "under", where the cable comes out from behind the new loop.
- Repeat this, alternating between the clockwise and counter-clockwise half-twists, until you run out of cable to wrap.
- Put on a cable tie, like the Musician's Gear Cable Ties 5-Pack or D'Addario Planet Waves Elastic Cable Ties 10-Pack to secure the cable.
Never use the cable itself to tie a knot. It may take a little practice, but you'll know that you've got this technique down when you can undo the tie, hold onto the end of the cable that finished that last loop and flip the cable out without anything tangling or twisting—which is also an incredibly satisfying thing to do when you're setting up your gear and people are watching.
Avoid Undue Cable Stress
The next thing to remember is that the cable is not a handle. Pulling on the cable to disconnect it from a jack puts stress on the cable and on the connector, and will lead to early failure and ongoing problems. Always grab the connector itself to disconnect it, and don't yank, but pull gently and firmly. On XLR male jacks and female plugs, as well as on locking TRS jacks, always make sure the locking tabs are depressed before you disconnect the cable.
Even when you're always taking good care of your cables, it's a good idea to test them regularly with something like the Livewire Cable Tester. You should probably even test brand-new XLR cables with this, just to be sure that they're all wired according to the AES "pin 2 hot" standard. Most will be, but you can still find older cables that date back to the dark ages of pro audio, when fistfights broke out over whether "hot" was pin 2 or pin 3. If you do run across one of those, what do you do? On to the next tip.
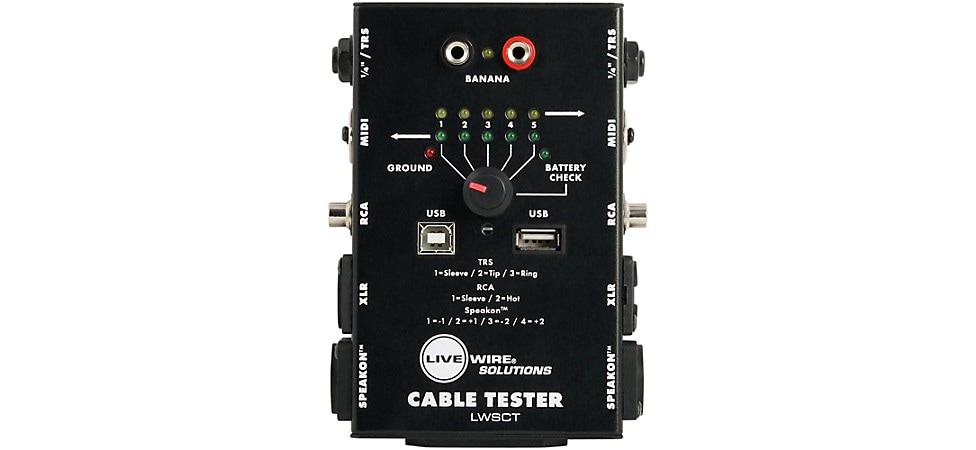
Pictured: Livewire Cable Tester
Learn to Solder
Learning how to use a soldering iron is not difficult, and once you know how, you can easily rewire those errant pin 2/pin 3 cables, do quick cable repairs at a gig, reflow cold solder joints on connectors and even build your own cables. This is an optional step, but one that comes in handy. We don't have space here to show you how, but there are tons of good tutorials floating around out there, or even local community college electronics classes where you can pick up the basics.
Quieting Your Pedalboard
For guitarists, a pedalboard can be one of the most frustrating sources of noise. You want all those incredible pedals, but that hum and crackling is driving you nuts. Assuming you've already consulted our article on how to build a guitar pedalboard and implemented the tips above about power supplies, cable length and routing, here are a few more things to consider.
To Gate or Not to Gate
It's more of a Band-Aid than a real solution, but a noise gate on your pedalboard can help reduce the noise while you're not playing. This is especially true for high-gain applications where any small bit of noise that's at the beginning of the signal chain just keeps getting more and more amplified as it moves through the different pedals. While your playing will mask the noise to a fair extent, when you're not playing, you need that gate to clamp down hard.
You can also accomplish some noise removal with a tightly notched EQ if need be, but that solution can have an undesired effect on the rest of your tone. This is especially true if you're getting peaks at multiple harmonics of the basic noise frequency. For example, 60Hz noise can show up anywhere along the harmonic series, at 120Hz, 180Hz, 240Hz, 300Hz, etc. While the EQ may be a temporary solution, you're not going to want to spend the rest of your life without those frequencies available.
A Buffer Against Noise
The subject of buffer amplifiers and pedalboards is one with a long and contentious history. But, one way to reduce noise is to increase the level of the non-noise signal and lower its impedance to better drive a longer signal path. While you don't want to place a buffer in front of vintage (or vintage reissue pedals) that rely on changes in the output impedance of the guitar for part of their tonal characteristics, a buffer, like the Old Blood Noise Endeavors EQ + Buffer Pedal or the MESA/Boogie HIGH-WIRE Dual Buffer & Boost Effects Pedal in your pedalboard, can help knock down noise and get a cleaner signal to your amp.

Pictured: Old Blood Noise Endeavors EQ + Buffer Pedal
Keep It Simple
While we all love a pedalboard chock full of cool pedals, sometimes the best solution to noise issues is to simplify your setup. For guitar and bass players who still want to have a variety of effects available, that can mean switching to a multi-FX unit, like the Line 6 Helix Multi-Effects Guitar Pedal or the HeadRush Pedalboard Multi-Effects Processor, to replace your pedalboard, or even your entire pedal and amp setup. If your show uses effects post-amp, most modern digital mixers have great delays, reverbs and more built into the board. In the studio, there are tons of plug-ins that can not only provide effects, but superbly modeled amp sounds as well. The cleaner the signal you can get into a board, the less noise you'll have coming out the other side.
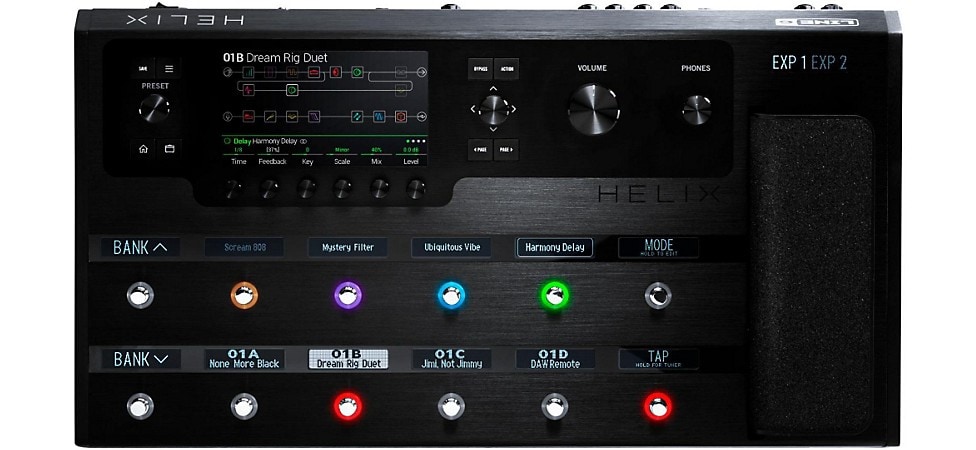
Pictured: Line 6 Helix Multi-Effects Pedal
Home Studio, Not Hum Studio
Nothing can be more frustrating than tracking down noise sources that disrupt recording sessions. For example, you may have spent time and money making sure the hiss from the AC unit isn't audible, but if that unit isn't on a totally different circuit and none of the power or audio lines are running near it, it can still be a noise source. The same is true for lighting sources. It's great to have adjustable lighting to set the mood in the studio, but if a dimmer or power supply for the lights is causing noise, that mood isn't going to help much.
The KISS (Keep It Simple, Stupid) principle can buy you some silence here. If you're using a DAW but routing signals to outboard gear for processing, check to see if there are plug-ins that can replace that outboard gear. Mix "in-the-box" as much as possible, since the possibilities for noise increase every time you send a signal out to a piece of analog gear and back. If you can keep it in the digital world as much as possible after you've recorded it, the less noise there will be. If you decide you do want some noise, many of the plug-ins that model vintage gear have settings to inject the type of noise typical of the original gear. Which is a whole lot better than having random noise you can't control.
Perhaps the most important key to keeping your studio quiet, though, is planning power distribution and audio cabling before you start setting up gear. That's true whether you're doing a serious construction project with underfloor cable channels, floor boxes and "room-within-a-room" construction, or just setting up and tearing down a small recording space in your spare bedroom. Plan out where everything is going to be and how you can get audio cables and power to the necessary points without running those lines near each other. It's probably worth investing in a few small six-to-eight channel snakes for audio lines and sketching out where outlets are to plan out power runs. Making sure that all the studio gear is on the same circuit and that you have isolation boxes for anything that might need to be on a different circuit will help keep noise to a minimum. If this kind of planning seems more than you want to deal with, or you've run through all the tips in this article and still haven't tracked it down, you might want to bring in a pro.
The Advantages of Pro Solutions
Having a professional come in and help you plan your studio ensures that you're starting with the best setup you can get. You'll be leveraging years of experience, not just from the adviser you talk with, but of the entire organization. Tapping into the knowledge of hundreds of experienced pros is what Guitar Center Professional is all about. They'll know the right solution for any problems because they've solved it before, and they can make savvy recommendations that fit your budget while catering to your needs.
Wrapping It All Up
There you have it—a basic list of ways to find and deal with noise in your system. It's a big subject though, and we can't claim that this is the absolute definitive article. Expect updates and supplementary information that will dig a little deeper on select topics. In the meantime, let's look at a general roundup of what we've looked at here.
Summary of Solutions
Here's a little checklist to guide you along the way when dealing with noise:
- Be systematic about tracking down the problem(s). Have a routine that you follow the same way when a problem pops up so you don't add unnecessary variables that can muddy the waters for a solution.
- Keep your signal paths as simple as possible. A straight, short cable run is always best. Adding adapters or longer cables only increases the possibility of introducing noise.
- Don't cross the streams, and by streams, we mean cables. Keeping power and signal cables as far apart and non-parallel as possible is always best. If they must cross, it should always be at as close to a right angle as you can get.
- Use the highest quality cables and power supplies you can afford, and plan on spending up on these if possible. They are the most vulnerable spots for noise to be generated or introduced.
- Some gear, like cables and surge protectors, have limited lifetimes and need replacement on a regular basis. Plan on the expense and think of it like an insurance policy against having to track down a sudden noise problem at a gig or in the studio.
- Regular maintenance and proper handling will go a long way to keeping noise out of your system.
Don't Try This at Home
If you're encountering problems that seem as if they need significant electrical work, don't take shortcuts or try and do it yourself, unless you're also a certified electrician. Electrical codes exist for a reason, and pros both know how to do this stuff and carry insurance to make sure that, if anything does go wrong, it's covered.
The same goes for your gear. If an instrument has noise issues, it may need shielding or repair work, and you should bring it into Guitar Center Repairs to get checked out. For pro audio devices and amplifiers, check with the manufacturer to find an authorized repair center. Getting it done right to begin with is almost always easier and cheaper in the long run.
Here's to Silence
At this point, we hope you've quieted down your studio, your performance setup and your whole signal chain. If you have any questions, please feel free to come into your local Guitar Center and chat with one of our knowledgeable Gear Advisers or check with our equally talented call center representatives. They've pretty much heard it all, and are likely to have solutions ready to hand. Now get out there and make some music.